Why Knowing How to Replace a Shingle Can Save Your Roof — and Your Wallet
Replacing a shingle is a critical maintenance task that prevents minor leaks from escalating into structural failures. Homeowners can successfully perform this repair by following a precise five-step protocol: assessing damage, gathering specialized tools, breaking the sealant bond, removing fasteners, and installing the replacement. A single missing or cracked shingle may look minor, but water gets in fast. Left unfixed, it can rot the decking beneath — turning a $50 repair into a much costlier problem. According to industry data, 60% of DIY shingle replacements fail due to incorrect nail placement or cold-weather installation. For homeowners who prefer to rely on professional roofing services, acting quickly is the most effective way to mitigate long-term costs and ensure structural integrity.
Here is a quick overview of how to replace a shingle:
- Assess the damage — confirm 1–10 shingles are affected on a low-slope roof
- Gather your tools — flat pry bar, roofing hammer, 1.5″ galvanized nails, roofing cement, and a matching replacement shingle
- Break the sealant bond and remove nails from the damaged shingle and the course above it
- Slide out the old shingle and inspect the decking underneath for rot or damage
- Slide the new shingle into place, nail it in the correct nailing zone, and reseal all affected edges with roofing cement
Whether a windstorm knocked a shingle loose or a falling branch cracked a few on your back slope, these are legitimate repairs you can handle yourself — if you know what you’re doing.
I’m Gerald Michaels, founder of Adept Construction, Inc., a family-owned roofing company based in Naperville, Illinois, with nearly three decades of experience helping homeowners replace a shingle correctly the first time. In this guide, I’ll walk you through every step — from damage assessment to final seal — so you can protect your home with confidence.

Assessing When to Replace a Shingle Yourself

Before you grab your ladder, we need to determine if your roof is a candidate for a DIY fix. Generally, it is safe and appropriate for a homeowner to replace a shingle themselves if the damage is localized to 1–10 shingles and the roof has a low to moderate slope (4:12 pitch or less). If you see widespread granule loss, sagging, or damage across more than 30% of the roof surface, you are likely looking at a situation that requires professional shingle roofing expertise.
The financial incentive for DIY is clear. Replacing a handful of shingles yourself typically costs between $50 and $150 in materials. In contrast, hiring a professional for a small repair usually starts between $150 and $400 due to labor, insurance, and trip minimums.
| Repair Type | DIY Cost (Materials) | Professional Cost |
|---|---|---|
| 1-10 Shingles | $50 – $150 | $150 – $400 |
| 10+ Shingles | $150 – $300 | $400 – $1,500 |
| Full Square | $300 – $500 | $1,000+ |
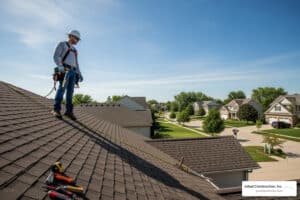
Safety Precautions and Mandatory Equipment
Safety is not optional when working at heights. In the Chicago suburbs, wind gusts can be unpredictable, making roof work hazardous. We mandate the following equipment for any DIY roofing project:
- Climbing Harness: Essential for any slope where a fall could be serious.
- Sturdy Ladder: Ensure it extends at least three feet above the roof edge.
- Non-slip Shoes: Rubber-soled boots provide the best traction on asphalt granules.
- A Spotter: Never work on a roof alone; have someone on the ground to steady the ladder and call for help if needed.
For a detailed look at safety protocols, you can consult the Roof Shingle Replacement – iFixit Repair Guide.
Essential Tools and Materials for Shingle Repair
To replace a shingle effectively, you need more than just a standard household hammer. Using the wrong tools can damage surrounding shingles, leading to more leaks. Gather these items before you start:
- Flat Pry Bar (Crowbar): Used to break the sealant bond and pull nails.
- Roofing Hammer: Specifically designed with a magnetized face and a striking head for roofing nails.
- Utility Knife: For trimming shingles to fit perfectly.
- 1.5-inch Galvanized Ring-Shank Nails: These provide superior holding power against Illinois winds.
- Roofing Cement & Caulking Gun: To reseal the shingles and cover exposed nail heads.
- Matching Shingles: A single bundle is usually enough for minor repairs.
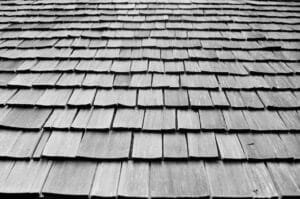
How to Remove Damaged Asphalt Shingles Safely
The secret to a successful repair is removing the old shingle without ruining the ones around it. Asphalt shingles are installed in overlapping layers, meaning one shingle is actually held down by the nails of the course above it.
- Break the Seal: On a cool day (which makes the sealant less “gooey”), slide your flat pry bar under the edge of the damaged shingle. Gently wiggle it to break the asphalt sealant bond.
- Locate the Nails: You will need to lift the shingle directly above the damaged one to find the nails holding the “target” shingle in place.
- Remove the Nails: Slide the pry bar under the shingle and center it over the nail. Pry upward to lift the nail head, then pull it out. You must do this for the damaged shingle AND the nails in the row above that penetrate the top of your target shingle.
- Protect the Granules: Avoid bending the surrounding shingles too far back, as this can cause them to crack or lose granules, shortening their lifespan.
For more technical tips on nail extraction, see the guide on How to Replace Roof Shingles – IKO.
Inspecting the Roof Decking for Damage
Once the old shingle is removed, don’t just rush to put the new one down. This is your only chance to see what’s happening underneath. Check the wooden decking for:
- Soft Spots or Rot: If the wood feels spongy, the leak has been active for a long time.
- Water Stains: Dark rings indicate moisture penetration.
- Gaps: Any gaps between deck boards wider than 1/4 inch require repair or sheathing.
If you find structural rot, you may need more than a simple shingle swap. Residents can find more info about roof repair in Downers Grove to address underlying structural issues.
Step-by-Step Installation Guide
Now that the area is clean and the decking is inspected, it’s time to install the replacement.
- Preparation: Trim the back corners of the new shingle slightly (rounding them off). This makes it easier to slide the shingle into the tight space between existing layers.
- Alignment: Slide the new shingle into the gap. Ensure the bottom edge aligns perfectly with the shingles to the left and right.
- Weather Considerations: Ideally, perform this when temperatures are between 40°F and 85°F. Below 40°F, shingles become brittle and crack; above 85°F, the asphalt becomes too soft and easily scuffed.
Selecting the Right Materials to Replace a Shingle
Matching your existing roof is harder than it sounds. Asphalt shingles fade by 15–20% in their first five years due to UV exposure. A brand-new shingle will almost always look darker than the old ones.
- Check the Attic: Often, builders leave a few spare bundles behind.
- Identify the Type: Are they 3-tab (flat, three cutouts) or Architectural (laminated, dimensional look)?
- Take a Sample: If you don’t have spares, take a piece of the damaged shingle to a local supply house.
For help with matching or larger projects, you can find more info about roof replacement in Naperville.
The Correct Nailing Pattern to Replace a Shingle
This is where most DIYers fail. Nail placement is the single most important factor in wind resistance.
- The Nailing Zone: For standard shingles, the nails must go roughly 1 inch above the cutouts/exposure line.
- Quantity: Use 4 nails per shingle for standard areas, and 6 nails if you live in a high-wind zone (over 90 mph).
- Manual Resealing: Because the factory sealant strip may not bond immediately in cooler weather, apply three quarter-sized dabs of roofing cement under the tabs of the new shingle to “re-bed” it.
Common DIY Mistakes and Safety Precautions
We see the same errors repeatedly when homeowners try to replace a shingle. Avoiding these can save you from a total roof failure:
- Over-driving Nails: If you hit the nail too hard, the head cuts through the shingle. This creates a “hinge” that allows the wind to rip the shingle off easily.
- High Nailing: Nailing too high (above the reinforced nail strip) means the nail only catches one layer of shingle instead of two, leading to “blow-offs.”
- Ignoring the “Course Above”: Many people forget to re-nail the shingles in the row above the one they replaced. Those shingles had their nails pulled too!
- Wrong Sealant: Never use “liquid nails” or bathroom caulk. Only use asphalt-based roofing cement.
When to Call a Professional for Roof Repair
While we encourage proactive maintenance, some jobs are simply too dangerous or complex for a Saturday afternoon. You should call us for professional shingle roofing services if:
- The Pitch is Steep: If your roof is a 6:12 pitch or higher, specialized safety gear and training are required.
- The Roof is Old: If your shingles are over 20 years old and brittle, trying to fix one will likely break three others.
- There is Interior Damage: If you see water spots on your ceiling, the leak may be coming from a valley or flashing, not just a single shingle.
- Insurance is Involved: If the damage was caused by a major storm, an official inspection is necessary for your claim.
Frequently Asked Questions about Shingle Replacement
How many shingles are in a standard bundle?
A standard bundle of asphalt shingles covers approximately 33.3 square feet. In the roofing world, we use the term “square,” which equals 100 square feet. Therefore, it takes three bundles to make one square. If you only need to replace a shingle or two, a single bundle is more than enough and provides spares for the future.
Can I install a new shingle over a damaged one?
No. This is a common mistake that leads to “bridging.” Installing a new shingle over a curled or damaged one creates an uneven surface that prevents the new shingle from sealing properly. It also traps moisture between the layers, which can accelerate deck rot. Always remove the old shingle first.
What is the best weather for shingle repair?
The “Goldilocks” zone for roofing is a sunny day between 45°F and 80°F. Sunlight is necessary to activate the thermal sealant strip on the shingles, which “glues” the roof together. If you must work in temperatures below 40°F, you must manually apply roofing cement to every shingle tab because the factory sealant will not bond in the cold.
Conclusion
At Adept Construction, Inc., we believe that an informed homeowner is our best customer. Learning how to replace a shingle can extend the life of your roof and provide peace of mind after a storm. However, your roof is a complex system of layers—decking, underlayment, flashing, and shingles—all working together.
If you find that your repair is more than you can handle, or if you’re concerned about the overall health of your roofing system in Naperville or Downers Grove, don’t hesitate to reach out. We are a family-owned business dedicated to superior workmanship and high-quality shingle roofing. We provide free estimates for all our neighbors in the Chicago western suburbs. Contact us today to schedule your free estimate and ensure your home stays dry and protected for years to come!