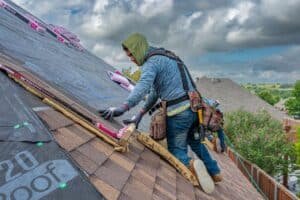

Pre-Installation Preparation and Safety Guidelines
Asphalt shingles installation is one of the most critical home improvement projects you can undertake — and one of the most commonly done wrong. Done right, a new asphalt shingle roof protects your home for 20 to 30 years. Done wrong, it can fail in just a few years due to preventable errors.
Here is a quick overview of the core steps involved:
- Prepare the site and inspect the roof deck — ensure the deck is clean, dry, and structurally sound
- Install drip edge — along eaves first, then rakes after underlayment
- Apply ice-and-water shield — at eaves, valleys, and penetrations
- Lay underlayment — overlapping courses from bottom to top
- Install starter strips — along all eave and rake edges
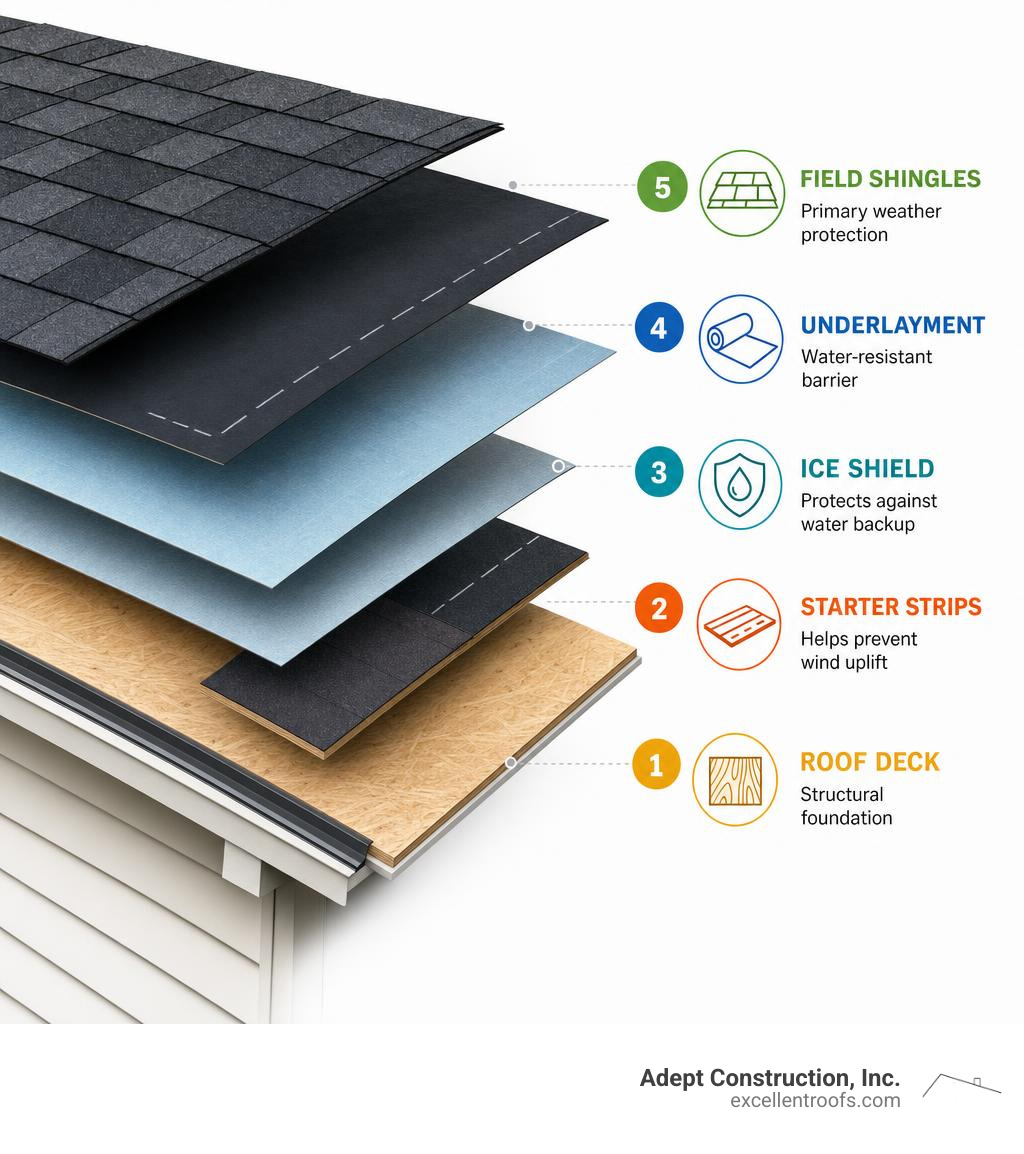
- Nail field shingles — working bottom to top with correct exposure and nailing pattern
- Flash all penetrations — chimneys, vents, walls, and valleys
- Install ridge caps — to seal and finish the peak
According to industry data, 68% of premature shingle failures trace back to just three preventable errors: missing starter strips, improper fastener placement, and insufficient valley protection. The shingles themselves are rarely the problem — installation technique is where roofs fail.
If you are a homeowner or property manager in the Chicago suburbs, understanding this process helps you hold your contractor accountable and protect your investment. For a professional assessment of your current roof, explore our residential roofing services to see how we approach every project.
I’m Gerald Michaels, founder of Adept Construction, Inc., and I’ve spent nearly three decades overseeing asphalt shingles installation on hundreds of residential and commercial properties across Naperville, Downers Grove, and the greater Chicago suburbs. In this guide, I’ll walk you through exactly how a proper installation is done — so you know what to expect and what to watch for.
Before a single nail is driven, safety and site preparation must take center stage. Roofing is inherently hazardous work, and setting up a secure, organized job site is the only way to prevent accidents and property damage.
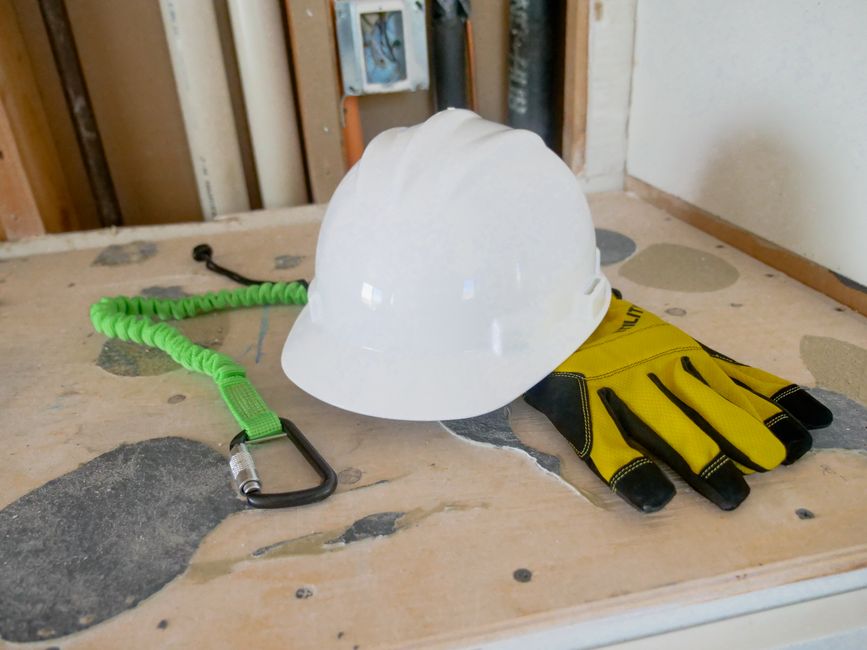
Safety Gear and Fall Protection
Roofing safety begins with adherence to OSHA safety and fall protection standards. For any slope steeper than 4:12, personal fall arrest systems (PFAS) are mandatory.
- Safety Harnesses: Every crew member must wear a properly fitted safety harness.
- Anchors and Lifelines: Anchors must be securely fastened to solid structural members of the roof framing. Lifelines should use heavy-duty nylon or polypropylene lines (typically 8–10 mm or 5/16″ to 7/16″ in diameter) equipped with shock-absorbing lanyards and non-slip loops spaced at 4-to-6-foot intervals.
- Ladder Safety: Set up heavy-duty extension ladders on stable, level ground. Ladders must extend 2 to 3 feet (61 to 91 cm) above the roof’s eave edge to allow for safe transition. Always secure the top of the ladder to the structure and keep all metal ladders far away from overhead electrical power lines.
Property and Yard Preparation
A professional roofing job requires protecting your landscaping and home exterior. Before materials arrive, we recommend taking the following preparation steps:
- Mow the lawn: Keeping the grass short makes it much easier for magnetic sweepers to find and collect stray nails.
- Clear the perimeter: Move patio furniture, grills, potted plants, and vehicles away from the house and park cars on the street.
- Document the site: Take clear photos of the driveway, siding, and landscaping before work begins to establish a baseline.
- Identify staging areas: Designate a flat, dry area on raised platforms (off the ground) to stack and store shingle bundles under ventilated tarps.
Climate and Code Compliance in Northern Illinois
In areas like Naperville, IL, and Downers Grove, IL, local building codes dictate specific requirements for wind resistance, fire ratings, and ice-dam prevention. In our harsh local winters, ice dams are a constant threat. Local codes require ice-and-water protection membranes to extend from the eave edge to a point at least 24 inches inside the interior warm-wall line.
Additionally, shingles must carry high-wind ratings to withstand the severe windstorms common to the Midwest. If you want to ensure your home is fully prepared for these regional challenges, hiring professional roof installation services is your best defense. For a more detailed breakdown of the complete roofing sequence, you can also consult this external Asphalt Shingle Installation: Step-by-Step Process 2026.
Roof Deck Preparation and Material Requirements
The performance of your shingles is directly tied to the quality of the surface beneath them. The roof deck serves as the structural foundation of the entire roofing system.
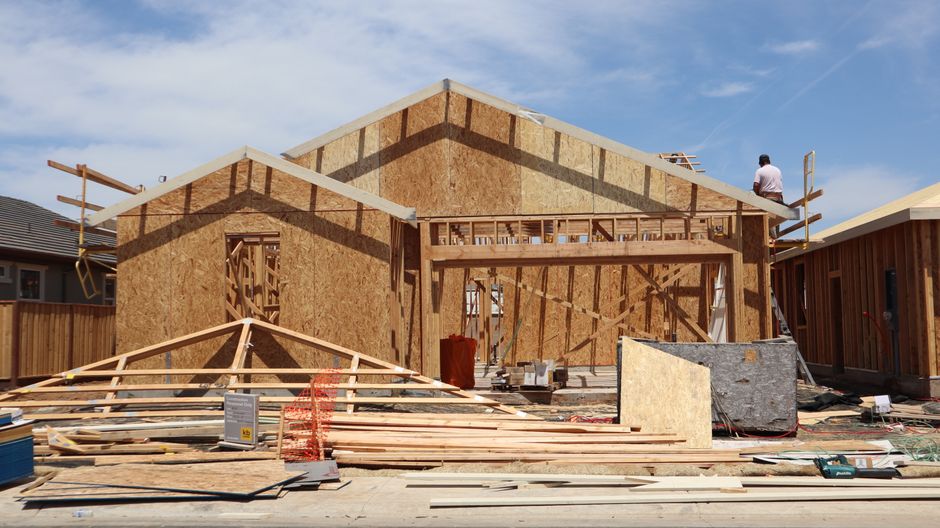
Structural Inspections and Deck Materials
Before installing any new underlayment, the existing roof must be torn down to the bare deck. We inspect every square inch of the sheathing for signs of rot, delamination, or sagging. Any compromised wood must be replaced immediately.
Approved roof deck materials include:
- Plywood Sheathing: Nominal 3/8-inch or 7/16-inch thick APA/TECO-rated plywood.
- OSB (Oriented Strand Board): APA-rated OSB of equivalent thickness.
- Wood Decking: Solid wood planks with a minimum actual thickness of 3/4 inch, free of large knots or wide gaps.
The deck surface must be completely flat, dry, clean, and free of protruding nails or staples before proceeding.
Attic Ventilation Standards
Inadequate attic ventilation is a primary cause of premature shingle deterioration, deck rot, and winter ice dams. To prevent these issues, the roof system must meet FHA Minimum Property Standards.
The 1:150 vs. 1:300 Rule: FHA standards require 1 square foot of net free attic ventilation area for every 150 square feet of attic floor area. This requirement can be reduced to 1 square foot per 300 square feet if an approved vapor barrier is installed on the warm side of the ceiling, or if there is a balanced system of continuous intake (soffit) and exhaust (ridge) vents.
A balanced ventilation system ensures that cool air enters at the lowest point of the roof (the eaves) and warm, moist air escapes at the highest point (the ridge). For a deeper look into deck prep and full tear-offs, check out our comprehensive shingle roof replacement guide.
Step-by-Step Asphalt Shingles Installation Sequence
Achieving a watertight roof requires installing components in a precise, logical order. Every layer must overlap the layer beneath it to guide water downward and outward.
1. Drip Edge Installation at Eaves
The drip edge is a non-corrosive metal flashing that prevents water from wicking back under the roof deck and rotting the fascia boards. At the eaves, the drip edge is installed directly onto the bare wood deck before any underlayment is applied.
2. Ice-and-Water Shield Application
In freezing climates like Illinois, a self-adhering, slip-resistant bituminous ice-and-water protection membrane is applied over the drip edge along the eaves. This membrane must overhang the eave edge by 1/4 to 3/4 of an inch and extend at least 24 inches inside the interior warm-wall line. It is also applied in all valleys, around chimneys, and around roof penetrations.
3. Underlayment Installation
Next, synthetic underlayment or #30 asphalt-saturated felt is rolled out horizontally across the remaining deck.
- Overlap at Eaves: The underlayment must overlap the eave ice-and-water shield by at least 4 inches.
- Horizontal Overlaps: Each subsequent course of underlayment must overlap the lower layer by at least 2 to 4 inches.
- Valley Overlaps: The underlayment must overlap the valley membrane by at least 6 inches.
- Rake Edges: At the rake (sloped) edges, the drip edge metal is installed over the underlayment to seal the system.
For a detailed look at high-quality product specifications, you can refer to the official manufacturer Roofing Installation Guide.
Proper Starter Strip and Underlayment Layout for Asphalt Shingles Installation
Starter strips are specialized, sealant-backed asphalt strips designed specifically to resist high winds. Failing to install starter strips is one of the most common causes of eave-edge blow-offs.
Starter Strip Placement
We install starter strips along all eave and rake edges. The starter strip must overhang the drip edge by 1/4 to 3/4 of an inch to direct rainwater cleanly into the gutters.
Joint Staggering
To prevent water from finding a direct path to the deck, the butt joints of the starter strip must be offset (staggered) from the joints of the first course of field shingles by at least 6 inches. This ensures that the seams of your shingles never line up with the seams of the starter layer beneath them. To learn more about selecting the right materials for this step, explore our resource on roofing shingles.
Nailing Patterns and Fastener Requirements for Asphalt Shingles Installation
Improper nail placement voids manufacturer warranties and leaves shingles vulnerable to wind damage. Nails must be driven straight and flush—never over-driven, under-driven, or crooked.
Fastener Specifications
Always use corrosion-resistant, hot-dip galvanized or stainless steel roofing nails. Fasteners must have a minimum 12-gauge shank and a head diameter of at least 3/8 inch. They must be long enough to penetrate at least 3/4 inch into the roof deck sheathing (or fully penetrate through the underside of the decking).
Nailing Zones and Patterns
- The Nailing Zone: Every shingle has a designated, printed nailing line. Nails must be placed precisely in this zone. Placing nails too high reduces the shingle’s wind resistance to near zero; placing them too low exposes the nail heads to the elements.
- Standard Pattern: For slopes up to 21:12 under normal wind conditions, a standard 4-nail pattern is sufficient.
- High-Wind Pattern: In high-wind areas or zones with design wind speeds exceeding 110 mph, a 6-nail pattern is required.
Shingle Types and Exposure
- Three-Tab Shingles: These traditional shingles require standard 5-inch exposure and precise alignment of the tabs. If you are weighing budget options, you can read about 3-tab shingle roof replacement cost.
- Architectural/Laminated Shingles: These multi-layered shingles typically require a 5.5-inch exposure. They offer superior wind performance and durability but have strict layout offsets to maintain their structural integrity. Architectural shingles should never be woven in valleys.
Flashing and Valley Construction Methods
Valleys and roof penetrations are the most common areas for leaks to develop. Proper flashing is non-negotiable for a long-lasting roof.
Valley Construction Methods
Valleys handle massive volumes of water runoff. There are three primary ways to construct them:
- Open Valleys (Recommended): An open valley uses a pre-formed, non-corrosive metal flashing (typically W-profile metal) lined with ice-and-water shield. Shingles are cut back on both sides, leaving the metal valley exposed. This is the highest-performing method for high-rainfall and heavy-debris environments because it sheds water and leaves rapidly without catching debris.
- Closed-Cut Valleys: Shingles from one side of the roof are run completely across the valley floor. Shingles from the opposing side are run across the valley, overlapped, and then cut in a straight line 2 inches back from the centerline.
- Woven Valleys: Shingles from both sides are woven together across the valley floor. While traditional, this method is only suitable for 3-tab shingles and should never be used with thick, multi-layered architectural shingles.
Flashing Roof Penetrations
- Step Flashing: Used where a sloped roof meets a vertical sidewall. Individual L-shaped metal steps are woven into each course of shingles to channel water down the roof slope.
- Chimney Flashing: Requires a complete system consisting of step flashing on the sides, a apron flashing at the bottom, a cricket (on wide chimneys) or backer flashing at the top, and counter-flashing let into the mortar joints.
- Vent Pipes: Neoprene or lead collar flashing boots are installed over plumbing vents, layered within the shingle courses so that the lower half of the flange sits on top of the shingles, while the upper half is tucked beneath the shingles above.
For more details on addressing localized wear and tear around flashings, read our step-by-step guide on repairing roof shingles.
Special Considerations for Steep Slopes and Extreme Weather
Extreme pitches and severe weather zones require specialized installation techniques to ensure the roof remains intact and watertight.
| Roof Slope Range | Classification | Underlayment Requirements | Fastening and Shingle Requirements |
|---|---|---|---|
| 2:12 to 4:12 | Low Slope | Double layer of underlayment or full ice-and-water shield | Standard fastening; check manufacturer low-slope limits |
| 4:12 to 21:12 | Standard Slope | Single layer of high-quality underlayment | Standard 4-nail or 6-nail high-wind pattern |
| Greater than 21:12 | Steep Slope / Mansard | Single layer of high-quality underlayment | 6-nail pattern + supplemental hand-applied asphalt cement |
Slopes Steeper than 21:12 (Mansard Roofs)
The Asphalt Roofing Manufacturers Association (ARMA) notes that standard self-sealing adhesives lose their effectiveness on slopes steeper than 21:12. Because gravity does not pull the shingle down hard enough to seal the factory adhesive strip, supplemental fastening is required:
- Nailing: Always use 6 nails per shingle.
- Supplemental Cement: Apply hand-applied spots of SBS-modified asphalt roof cement under each shingle tab. For standard laminated shingles, apply four spots of cement near the lower edge (two near the corners, two equally spaced). For 3-tab shingles, apply two spots of cement under each tab near the corners.
Wildfire-Prone and High-Wind Zones
In high-wind coastal or open plains areas, hot-dip galvanized or stainless steel fasteners are required if the home is within 3,000 feet of salt or brackish water. In wildfire-prone zones, Class A fire-resistant underlayment materials must be used, and continuous bands of fire-resistant asphalt roof cement should be applied beneath the shingle courses to prevent embers from blowing under the roof covering.
Frequently Asked Questions About Asphalt Shingle Roofing
What is the maximum recommended roof slope for standard asphalt shingle installation?
The maximum slope considered suitable for normal asphalt shingle application is 21:12 (21 inches of rise per 12 inches of run). On any slope steeper than 21:12, including mansard roofs, gravity prevents the factory-applied self-sealing adhesive from bonding properly. These steep applications require a 6-nail pattern paired with hand-applied spots of asphalt roof cement under each shingle tab to prevent wind uplift.
What are the most common installation mistakes that lead to premature roof failure?
Statistically, 68% of premature shingle failures are caused by three common errors:
- Missing Starter Strips: Skipping starter strips at the eave and rake edges removes the adhesive bond for the perimeter shingles, leading to wind blow-offs.
- Improper Fastener Placement: Driving nails above the designated nailing zone or high-nailing causes shingles to slip out of place.
- Insufficient Valley Protection: Failing to install ice-and-water shield or using improper valley layouts leads to rapid water intrusion in high-flow areas.
How long does an asphalt shingle roof last in Illinois weather?
In the challenging climate of Northern Illinois, a standard 3-tab shingle roof typically lasts 15 to 20 years. High-quality architectural shingles last 25 to 30 years, depending on proper attic ventilation. Our local freeze-thaw cycles and hot, humid summers cause “thermal shock,” which expands and contracts shingles rapidly. Proper attic ventilation is the single most important factor in regulating these temperatures and maximizing your roof’s lifespan. If you suspect your roof is reaching the end of its useful life, you can learn more about scheduling a professional roof replacement in Downers Grove.
Conclusion
Installing asphalt shingles is a highly engineered process where every component plays a vital role. From the structural roof deck and attic ventilation to the ice-and-water shield, starter strips, and precise nailing patterns, skipping even a single step can lead to premature system failure.
At Adept Construction, Inc., we bring nearly 30 years of local expertise, high-quality workmanship, and dedicated customer service to every project in Downers Grove, Naperville, and the surrounding Chicago suburbs. We understand the unique demands that Illinois winters and summers place on your home, and we never cut corners.
Whether you need a minor repair or a complete, code-compliant roof replacement, we are here to help. Contact us today to schedule your consultation and receive a free estimate on your next professional roof installation.