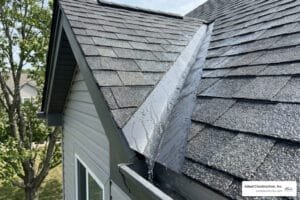

Why Every Homeowner Needs to Know How to Fix Roof Damage by Dish Mounts
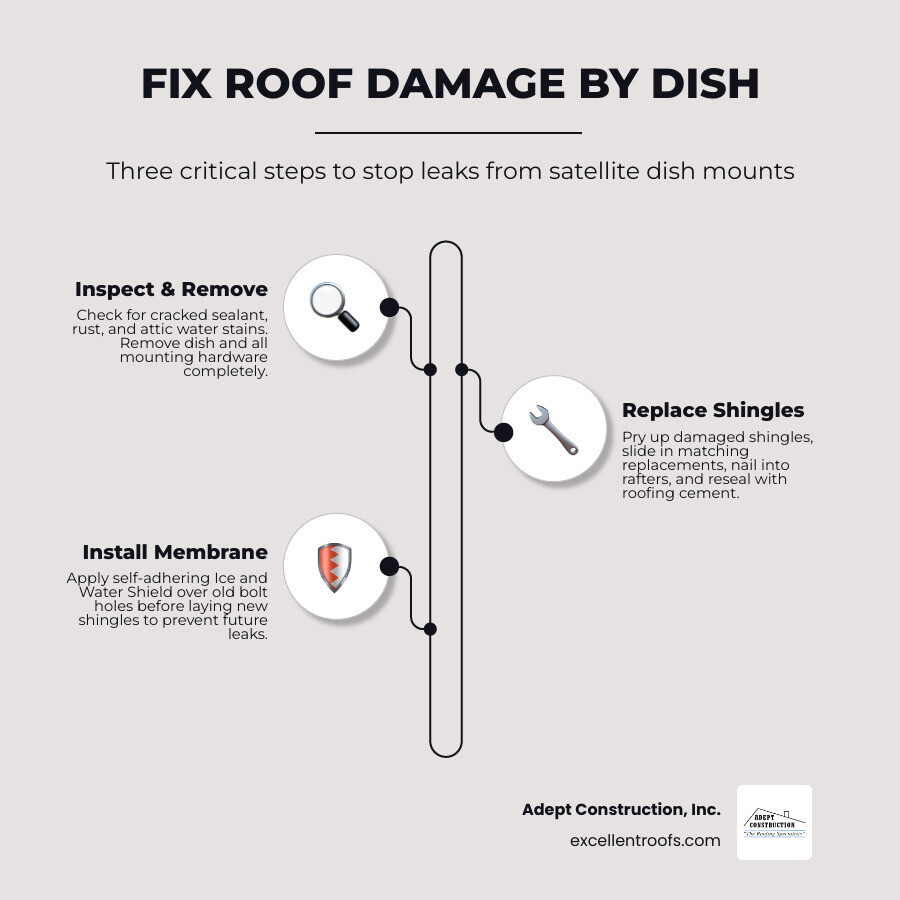
Here’s the quick answer on how to fix roof damage from a satellite dish, provided by an expert roofing contractor in Downers Grove:
- Inspect the area around the mount for cracked sealant, rust stains, and loose bolts — then check your attic for water stains directly below.
- Remove the dish and all mounting hardware completely.
- Pry up the damaged shingles using a flat bar, along with the shingle directly above them.
- Slide in a matching replacement shingle and nail it down securely into a structural rafter.
- Apply roofing cement under all disturbed shingles to reseal them.
- Install a self-adhering Ice and Water Shield membrane over old bolt holes before laying new shingles.
- Call a professional if you find rotted decking, extensive water damage, or the roof pitch is too steep to work safely.
A satellite dish might seem harmless sitting up on your roof — until it isn’t. Those lag bolts drilled through your shingles, underlayment, and roof decking create direct pathways for water. Over time, the sealant around them dries out, cracks, and peels away. The dish acts like a small sail in the wind, constantly shifting and slowly widening those holes. Water follows the bolt threads straight into your attic, often for months before you notice a stain on your ceiling.
The problem gets worse when the dish is abandoned. Many homes — especially those that have changed hands — carry what roofing professionals call a “ghost dish”: old, unused satellite hardware left behind by a previous owner, silently leaking while the new homeowner has no idea.
If you’ve recently removed a dish, inherited one from a prior owner, or are planning a roof replacement, understanding how to properly repair the damage is critical to protecting your home.
I’m Gerald Michaels, founder of Adept Construction, Inc., a family-owned roofing company serving the Chicago suburbs since 1997 — and helping homeowners fix roof damage by dish mounts is one of the most common repair calls we receive. In the sections below, I’ll walk you through exactly what to look for, how to repair it correctly, and how to prevent it from happening again.
Quick fix roof damage by dish definitions:
How to Identify and Fix Roof Damage by Dish Installations
Before you can fix the problem, you need to know exactly what you are dealing with. Identifying satellite dish damage early can save you thousands of dollars in structural repairs.
The physical mounting of a satellite dish involves driving several heavy-duty lag bolts (typically 1/4-inch or 5/16-inch in diameter) directly through the asphalt shingles and into the underlying roof deck. In a perfect world, these bolts anchor into a solid wood rafter. In reality, installers often miss the rafters entirely, leaving the bolts secured only by the thin plywood of the roof deck.
Over time, wind leverage plays a massive role in degrading this setup. A standard satellite dish acts like a small sail. High winds exert continuous leverage on the mast, creating micro-movements that rock the mounting bracket back and forth. This constant vibration loosens the lag bolts and slowly widens the holes in the roof deck.
To confirm if your satellite dish is causing a leak, follow this diagnostic process:
- The Attic Inspection: Go into your attic with a high-powered flashlight during or immediately after a heavy rainstorm. Locate the area directly beneath the exterior dish mount. Look for damp insulation, water stains on the underside of the plywood decking, or dark water tracks running down the sides of the rafters.
- The Exterior Bracket Test: If you can safely access your roof, check the physical stability of the J-mount bracket. If the bracket wobbles when you apply light pressure, the lag bolts have stripped wood fibers in the decking.
- The Sealant Audit: Look closely at the base of the mounting plate. Installers typically apply a dab of silicone or tar over the bolt heads. If you see visible sealant failure — such as dried, cracked, or peeling caulk — water is likely following the bolt threads directly into your home.
For a comprehensive breakdown of locating hidden water entry points, consult our roof leak detection complete guide.
Step-by-Step Guide: How to Repair Holes Left by a Satellite Dish Mount
If you have decided to permanently remove an old “ghost dish” and need to patch the resulting holes, you must perform a permanent repair. Squirting a handful of silicone caulk into the empty bolt holes is a temporary fix that will degrade within a single season under the intense summer heat of Illinois.
Instead, a proper repair requires replacing the damaged shingles and restoring the underlayment barrier. Here is the professional method to do this:
Tools and Materials Needed:
- Flat pry bar (shingle stripper)
- Hammer
- Utility knife
- Replacement shingles (matching your current roof color)
- 1-1/4 inch corrosion-resistant roofing nails
- Self-adhering Ice and Water Shield membrane (or heavy-duty butyl rubber patch)
- Professional-grade asphalt roofing cement
Step 1: Safely Remove the Hardware
Power down the receiver inside your home, disconnect the coaxial cables, and cut the grounding wires. Use a 7/16-inch or 1/2-inch socket wrench to back out the lag bolts from the mounting foot. Carefully lift the bracket away. If the bracket is stuck to the shingles due to old tar pads, use your putty knife to gently pry it free without tearing the surrounding shingles.
Step 2: Pry Up the Damaged Shingles
Asphalt shingles overlap in layers, meaning a single shingle is held down by nails that also pass through the shingle directly above it. To remove the damaged shingle containing the bolt holes:
- Slide your flat pry bar carefully under the shingle directly above the damaged one to break the self-sealing tar strip.
- Slide the pry bar under the damaged shingle itself to release its adhesive bond.
- Locate the nails holding both shingles in place. Gently slide the pry bar under the nail heads and pry them upward, removing them completely.
Step 3: Patch the Underlayment and Plywood Deck
Once the damaged shingle is removed, you will see the exposed underlayment and the open lag bolt holes in the wood decking. If the plywood is solid and dry:
- Pack the open pilot holes with a high-quality UV-resistant exterior sealant.
- Cut a square patch of self-adhering Ice and Water Shield membrane that extends at least 3 inches beyond the damaged area on all sides. Press it firmly over the holes to create a watertight, self-sealing barrier.
Step 4: Install the New Shingle
Slide the new, matching shingle into the vacant space, aligning it perfectly with the adjacent courses. Drive new roofing nails through the designated nail line of the new shingle, and re-nail the shingle above it.
Step 5: Seal the Tabs
Because the original self-sealing tar strips have been disturbed, they will not re-adhere on their own. Apply a few generous dabs of professional-grade asphalt roofing cement under the tabs of both the new shingle and the shingle directly above it. Press them down firmly to complete the seal.
For more details on handling asphalt shingle repairs, check out our asphalt roof leak repair ultimate guide.
Managing Your Satellite Dish During a Roof Replacement
When it is time for a full roof replacement, managing your satellite dish requires careful coordination. A common point of confusion is who handles the removal and reinstallation of the equipment.
If your roof replacement is part of an insurance claim due to wind or hail damage, your insurance company will typically include a “detach and reset” fee (usually ranging from $30 to $50) in their official estimate. This line item is meant to cover the labor of taking the dish down so the roofers can install the new shingles. However, insurance companies expect the satellite provider to handle the technical reinstallation and alignment, as the dish itself is often leased equipment.
To avoid long periods of television downtime, we recommend coordinating your roofing schedule closely with your satellite provider. Arrange for the roofing crew to remove the dish during the tear-off process, and schedule a certified satellite technician to install and align the dish immediately after the new roof is completed.
Why You Shouldn’t Let a Roofer Fix Roof Damage by Dish Reinstallation
While it may be tempting to let your roofing crew bolt the satellite dish back onto your brand-new roof to save time, this is a critical mistake.
First, roofing crews do not carry the highly precise signal meters required to “peak” (align) modern multi-LNB satellite dishes. A shift of as little as 1/4-inch in the dish bracket can completely disrupt your television signal.
Second, roofers often fail to ensure the mounting mast is perfectly plumb (vertical) in all directions. If the mast is not plumb, the dish cannot track the satellite arc correctly, resulting in permanent signal degradation.
Finally, roofers frequently make improper installations when rushing to finish a job. It is not uncommon to see a roofing crew nail a satellite dish directly through brand-new shingles without hitting a structural rafter, creating immediate leak hazards on a newly completed roof. Letting a roofer reinstall your dish can void your new roof’s workmanship warranty. For more information on protecting your investment, read our roof repair complete guide.
Safer Alternatives to Avoid Having to Fix Roof Damage by Dish Mounts
The single best way to prevent future roof leaks is to avoid mounting the satellite dish on your shingles entirely. When your satellite technician arrives to reinstall the service, request one of these highly effective, non-penetrating alternatives:
- Fascia Mount: The bracket is bolted directly into the wooden fascia board at the roof’s edge. This keeps all penetrations completely off the horizontal roof plane.
- Gable Mount: This bracket wraps around the gable end of your home, securing directly into the exterior wall framing.
- Brick or Masonry Wall Mount: If your home has a brick exterior, mounting the dish to the brick using heavy-duty lag shields driven into individual brick faces (never the mortar joints) provides an incredibly sturdy mount with zero roof risk.
- Ground Pole Mount: The dish is mounted on a metal pole anchored in a concrete base in your yard. This completely eliminates roof damage risks and makes future servicing incredibly easy.
If a roof mount is absolutely unavoidable due to line-of-sight restrictions, request that the installer use an under-shingle “commence mount” or a specialized flashing kit rather than bolting the bracket directly through the face of the shingles. For general tips on avoiding roof wear, see our article on one simple way to fix roof damage.
Frequently Asked Questions About Satellite Dish Roof Damage
Will homeowners insurance cover roof damage caused by a satellite dish?
Standard homeowners insurance policies generally do not cover leaks or structural rot caused by improper satellite dish installations. Insurance companies classify this under “faulty workmanship” or “negligent installation” exclusions.
However, if your satellite dish is ripped off your roof during a severe storm, tearing away shingles and exposing the decking, the resulting damage is typically covered as storm damage. If you are dealing with storm-related roof issues, please consult our storm damage roof repair ultimate guide.
Can I use sealant or caulk to fix the holes, or do I need to replace shingles?
Using silicone, caulk, or roofing plastic cement to plug empty bolt holes is a temporary patch that should only be used in an emergency. Under intense summer heat, standard silicone dries out, cracks, and pulls away from asphalt shingles, allowing water to follow the path of least resistance into your home.
For temporary emergency patches, especially on rubber or flat roofs, high-quality butyl rubber tapes like Eternabond are widely recommended and can last for several seasons, but the only permanent solution for an asphalt shingle roof is a complete shingle replacement.
How much does it typically cost to remove a satellite dish and repair the roof?
The cost of satellite dish removal and roof patching depends on the severity of the damage and your roof type:
| Service Type | Average Cost Range | Key Factors |
|---|---|---|
| Professional Dish Removal Only | $200 – $600 | Accessibility, height, and disposal fees |
| Minor Shingle Patching & Sealing | $250 – $500 | Number of damaged shingles, roof pitch |
| Structural Decking & Underlayment Repair | $500 – $2,500 | Extent of wood rot, attic mold mitigation |
Conclusion
Leaving an old, abandoned satellite dish on your roof is a ticking time bomb for water damage. Whether you need to safely remove a “ghost dish,” repair active leaks, or prepare for a complete roof replacement, the team at Adept Construction, Inc. is here to help.
We provide professional, long-lasting roof repairs that restore your home’s waterproof barrier and protect your structural integrity. We proudly serve homeowners throughout Downers Grove, IL, Naperville, IL, and the surrounding areas.
Contact us today to schedule an inspection and get a free estimate on your roof repair needs. Let us give you the peace of mind that your roof is safe, secure, and completely leak-free!
- Need immediate professional help?
- Check out our specialized handyman roofing repair services
- Schedule a local consultation with our roof repair services in Downers Grove
- Book an inspection with our roof repair services in Naperville