
How Much Does Roof Installation Cost? (2026 Guide)
Roof installation is one of the largest investments a homeowner will ever make — and knowing what to expect before the first shingle goes down can save you thousands of dollars and a lot of frustration.
Here is a quick answer to what most homeowners want to know:
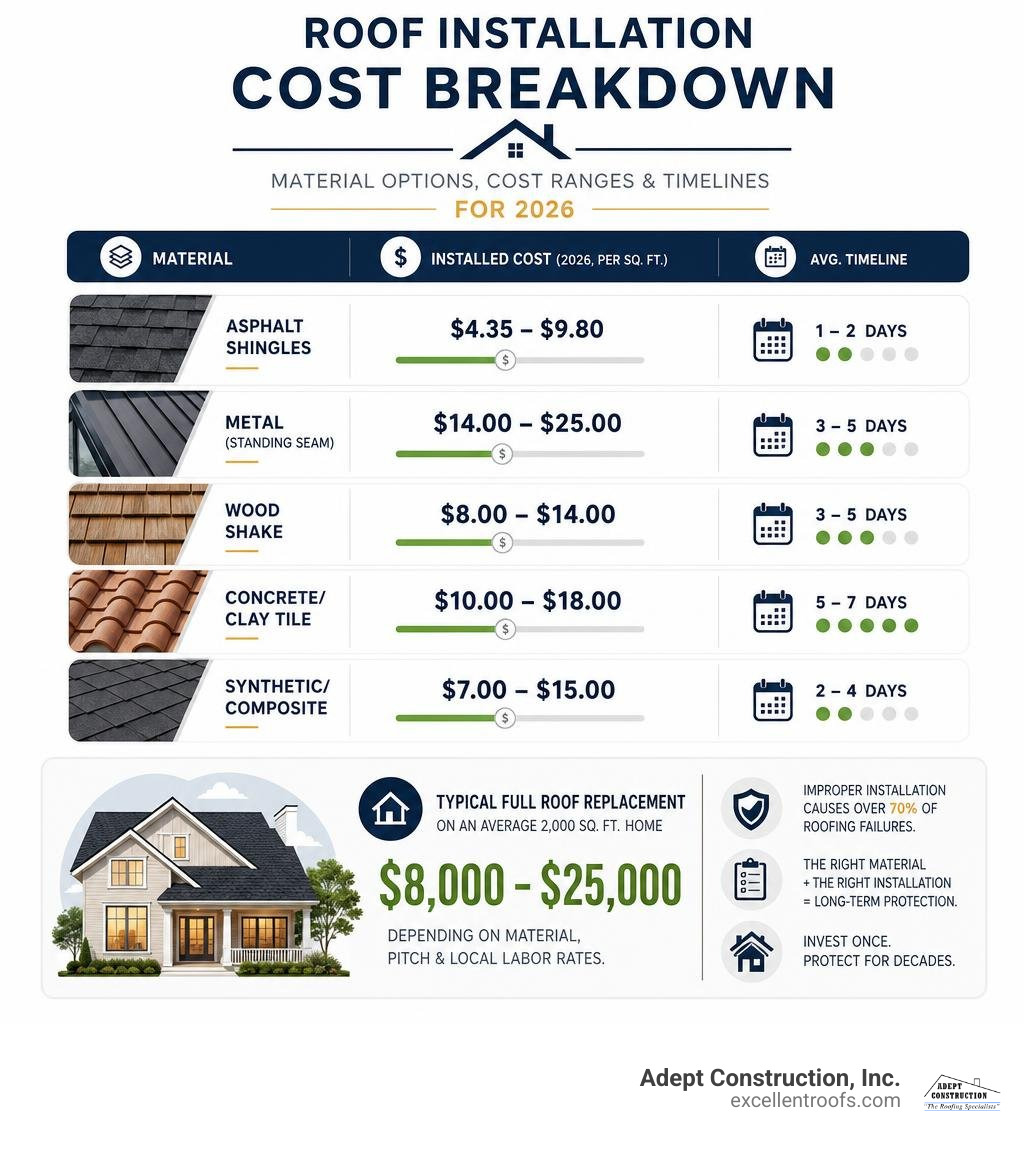
| Material | Installed Cost (2026, per sq. ft.) | Avg. Timeline |
|---|---|---|
| Asphalt shingles | $4.35 – $9.80 | 1 – 2 days |
| Metal (standing seam) | $14.00 – $25.00 | 3 – 5 days |
| Wood shake | $8.00 – $14.00 | 3 – 5 days |
| Concrete/clay tile | $10.00 – $18.00 | 5 – 7 days |
| Synthetic/composite | $7.00 – $15.00 | 2 – 4 days |
A full roof replacement on an average 2,000 sq. ft. home runs between $8,000 and $25,000 depending on material, pitch, and local labor rates. Improper installation causes over 70% of all roofing failures — so the contractor and process you choose matter just as much as the material.
This guide breaks down every cost driver, every installation step, and every mistake worth avoiding — so you can make a confident, informed decision. If you want to skip the research and talk to someone you can trust, Adept Construction offers free roofing estimates with no pressure and no guesswork.
I’m Gerald Michaels, founder and president of Adept Construction, Inc., and I’ve been leading roof installation projects across Naperville, Downers Grove, and Chicago’s western suburbs since 1997. In nearly three decades of hands-on experience, I’ve seen every mistake, every shortcut, and every warning sign — and this guide reflects what I’ve learned from all of it.
Key Indicators: When Do You Need a New Roof?
Knowing when to replace your roof prevents a minor leak from turning into a structural catastrophe. While the average roof lasts between 20 and 25 years, local weather patterns in Northern Illinois—ranging from heavy winter snows to humid summer storms—can accelerate this timeline.
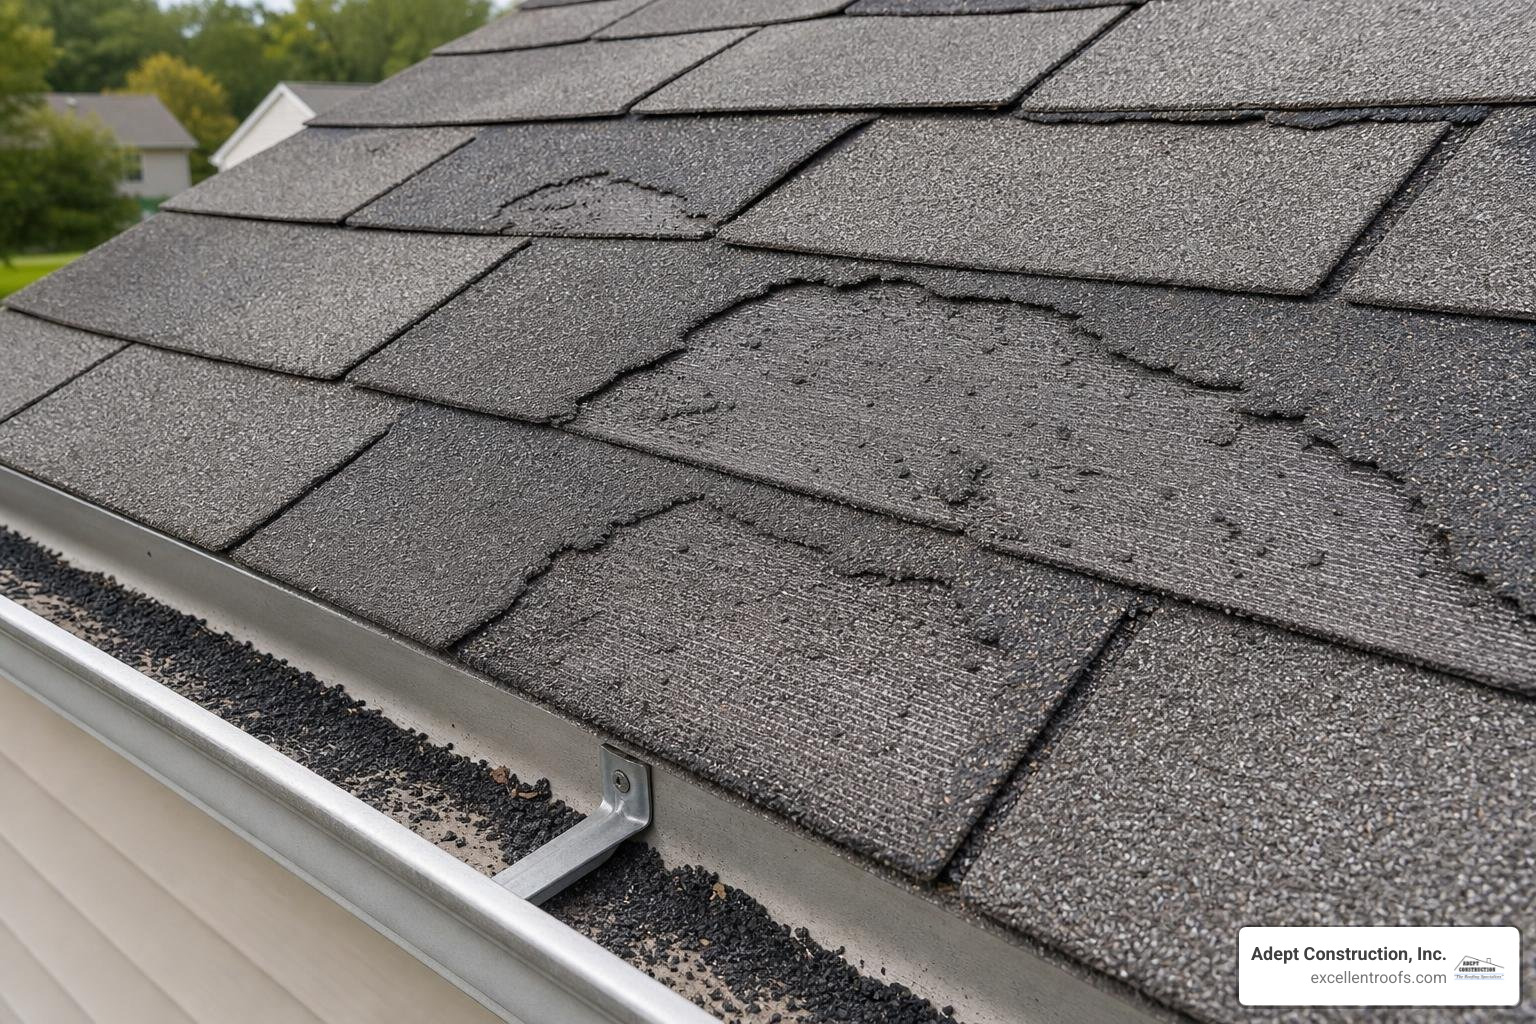
If your roof is approaching its 20-year milestone, you should regularly perform visual checks. The primary indicators that you require professional Residential Roof Installation services include:
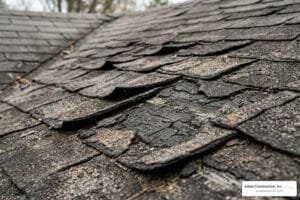
- Granulation Loss: When asphalt shingles lose their protective sand-like granules, they expose the underlying fiberglass mat to solar UV rays. Look for piles of dark granules in your gutters or bald spots on your shingles.
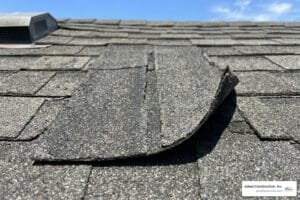
- Curling, Clawing, or Missing Shingles: Shingles that curl upward at the edges or cup in the middle are highly vulnerable to wind uplift.
- Dark Streaks and Biological Growth: Many homeowners mistake dark streaks on their roof for simple dirt. These streaks are actually blue-green algae, moss, or lichen that trap moisture against the shingles, rotting the organic backing.
- Interior Water Stains and Attic Leaks: Active leaks in your attic or yellow-brown water stains on your upper-floor ceilings are clear signs of water bypassing your shingles and underlayment.
- Structural Sagging: A sagging roofline is a critical warning sign of compromised roof decking or structural rafters, requiring immediate attention from professional roofing services.
Step-by-Step Roof Installation Process and Cost Breakdown
A proper roof installation is not just about nailing down shingles; it is a highly coordinated system of protective layers working together.
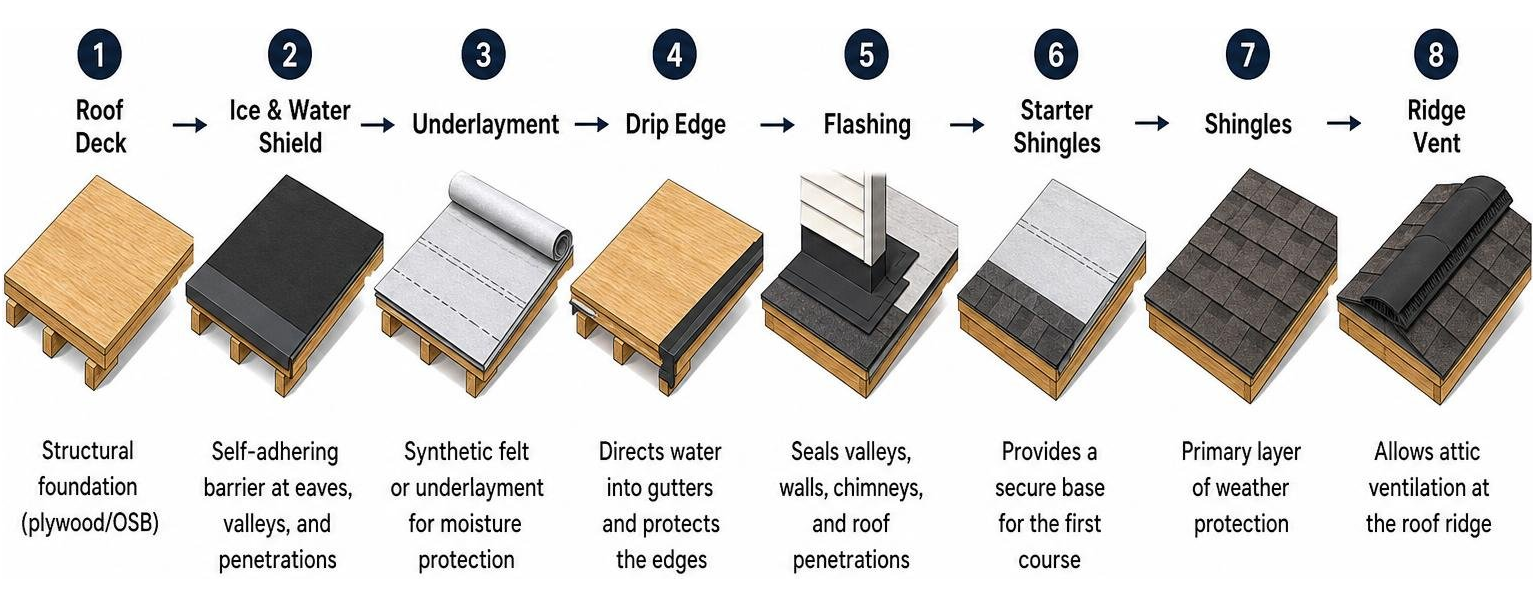
We follow a rigorous, code-compliant sequence to ensure maximum weather protection:
- Site Preparation and Property Protection: We place heavy-duty tarps over landscaping, windows, and decks. A dumpster is positioned close to the eaves to catch debris directly.
- Tear-Off of Old Materials: We remove all existing shingles, underlayment, and flashing down to the bare wood deck. Layering new shingles over old ones is a shortcut that traps heat, voids manufacturer warranties, and conceals structural rot.
- Deck Inspection and Repair: We inspect the plywood or oriented strand board (OSB) sheathing. Any soft, rotted, or delaminated wood is cut out and replaced to establish a solid structural foundation.
- Drip Edge Installation: A metal drip edge is installed along the eaves to guide water away from the fascia boards and directly into the gutters.
- Ice-and-Water Shield Application: In cold climates like Downers Grove and Naperville, we apply a self-adhering polymer-modified bitumen membrane. This waterproof barrier must extend from the lowest eave edge to a point at least 24 inches inside the heated exterior wall line to prevent leaks from winter ice dams.
- Underlayment Installation: We lay down synthetic underlayment (which resists tearing and moisture better than traditional 15-lb felt paper) across the remaining deck, overlapping the seams by at least 6 inches.
- Flashing and Valley Construction: Corrosion-resistant metal flashing is installed in high-risk leak zones, such as roof valleys, chimneys, dormers, and wall intersections.
- Field Material Installation: We install the starter shingles, followed by the main roofing material, using precise nailing patterns.
- Ridge Vent and Ridge Cap Installation: We cut a continuous slot along the roof peak to allow hot air to escape, then cover it with a ridge vent and matching ridge cap shingles.
- Final Cleanup and Inspection: We perform a meticulous magnetic sweep of your yard and driveway to collect stray nails, followed by a multi-point quality check of the entire system.
For a deeper dive into technical specifications, you can review the official Roofing Installation Guide.
Preparing for DIY Roof Installation: Safety and Tools
If you plan to tackle a portion of your roof installation yourself, safety must be your absolute priority. The construction sector consistently ranks roofing as one of the highest-risk occupations.
Before climbing a ladder, ensure you have a high-quality fall protection kit. A standard kit containing a safety harness, shock-absorbing lanyard, roof anchor hook, and safety rope costs approximately $100—an incredibly small price to pay for your life.
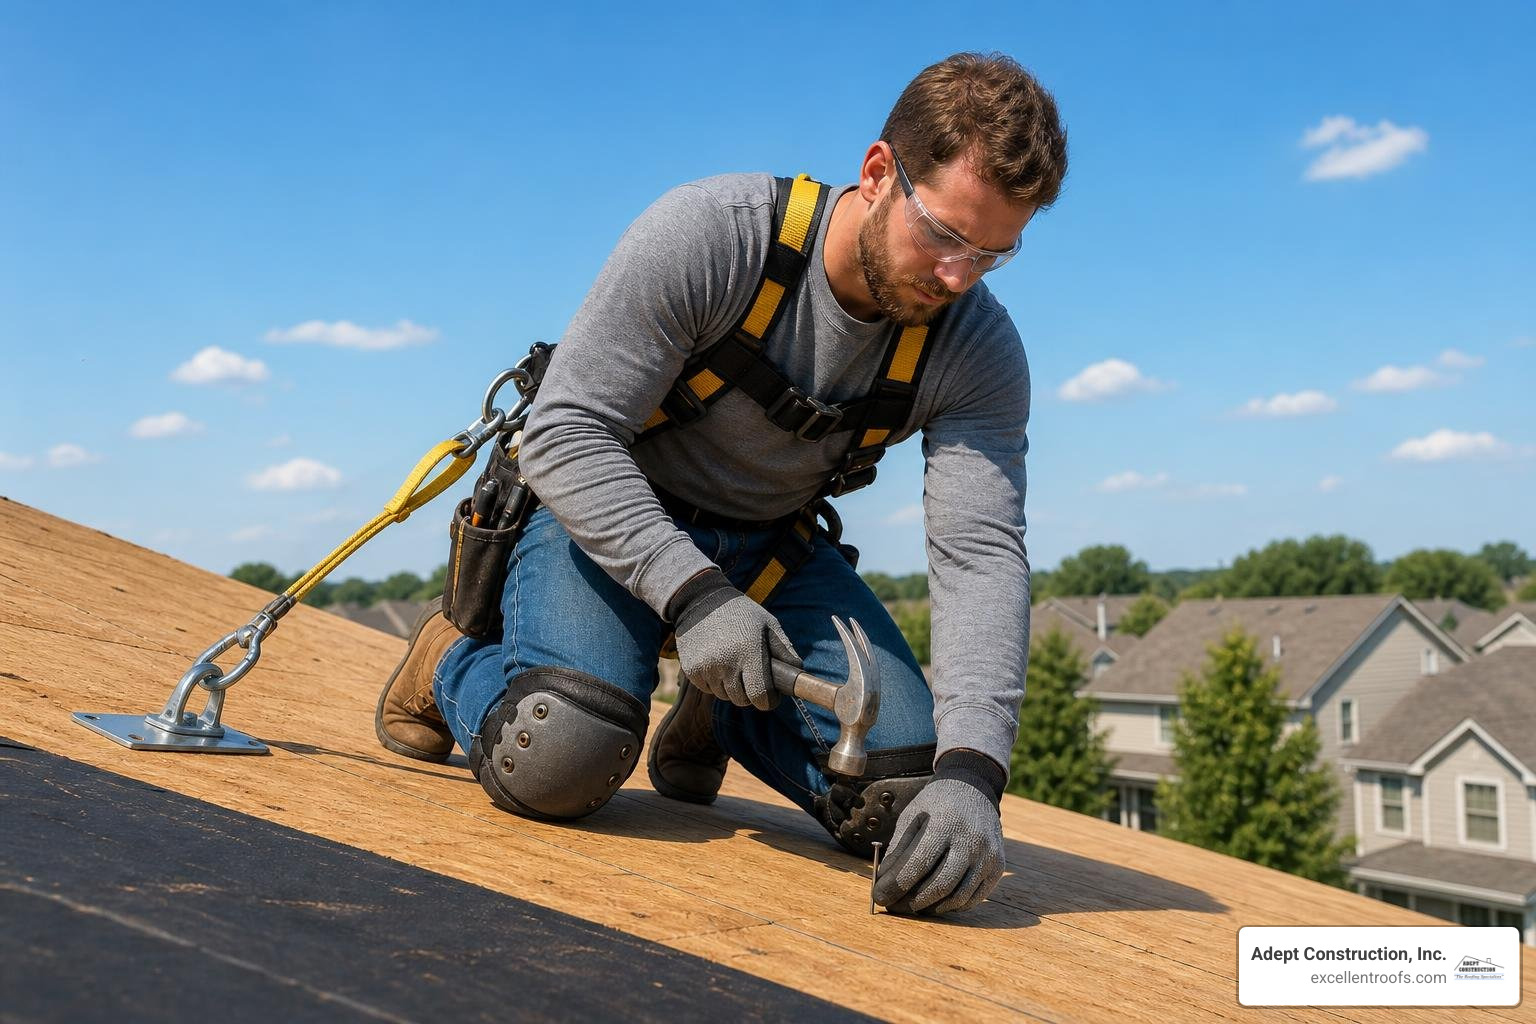
Use this checklist to prepare for the job:
- Safety Gear: Rubber-soled work boots with excellent traction, heavy-duty knee pads, safety glasses, and cut-resistant work gloves.
- The 4-to-1 Ladder Rule: Set your extension ladder on a stable, level surface at a safe angle of 1 foot out for every 4 feet of height. Secure the ladder at the top, ensuring it extends at least 3 feet past the roof edge.
- Weather Conditions: The ideal temperature range for installing asphalt shingles is between 50 and 80 degrees Fahrenheit. Below 50 degrees, asphalt shingles become brittle and crack during nailing, and their self-sealing adhesive strips will not bond properly. Above 80 degrees, the shingles soften, making them easy to scuff and tear underfoot.
- Physical Demands: Each bundle of shingles weighs between 50 and 80 pounds. Carrying dozens of these bundles up a ladder is physically exhausting and presents a high risk of losing your balance.
- Roof Pitch Limits: Professional roofers consider any roof pitch lower than an 8/12 slope walkable without specialized continuous toe-boards. For DIYers, we strongly advise against walking on any slope steeper than a 6/12 pitch without professional scaffolding.
To learn more about preparing your property, read our Roofing Installation Guide 2026.
Executing the Roof Installation: From Starter Strips to Ridge Vents
Once your deck is prepped, the field materials must be installed in a strict, overlapping sequence to shed water effectively.
First, install starter shingles along the eave and rake edges. These specialized strips provide a secure sealant line that prevents high winds from lifting the bottom row of shingles. Ensure the leading edge of your starter course extends exactly 1/2 inch beyond your metal drip edge to prevent water from wicking backward onto your fascia boards.
Next, address the valleys, which channel massive amounts of water during heavy rainstorms. You can construct an open valley using preformed metal “W” flashing, or a closed-cut valley where shingles overlap. If using an open valley, snap two chalk lines that diverge slightly at a rate of 1/8 inch per foot as they run downward. This divergence prevents debris from clogging the valley and facilitates rapid water runoff.
When nailing your field shingles, follow the manufacturer’s specified exposure (typically between 5 and 6-1/2 inches) and offset each row by a partial shingle tab to prevent vertical seams from aligning. Use a minimum of 4 nails per shingle under normal conditions, and 6 nails in high-wind zones. Drive the nails straight and flush with the shingle surface—improper nailing is the single leading cause of roof failures during severe storms.
At vertical walls and chimneys, install step flashing. Each piece of step flashing must overlap the previous one and be integrated layer-by-layer with the shingles. For chimneys and brick walls, cover the step flashing with counterflashing that is recessed into mortar joints and sealed with a high-grade, UV-resistant sealant like Lexel.
For a comprehensive breakdown of professional shingling methods, consult the Roofing Installation Guide: Professional & DIY Methods 2026.
Cost Drivers and Timelines for a New Roof
Every home is unique, and several key variables will drive your final roof installation estimate up or down.
| Cost Driver | Impact on Price | Key Considerations |
|---|---|---|
| Roof Size | High | Measured in “squares” (1 square = 100 sq. ft.). |
| Material Choice | Very High | Premium materials (metal, tile) have high upfront costs but last 50+ years. |
| Roof Pitch & Complexity | High | Steeper slopes (above 8/12) and multiple valleys/dormers require more labor and safety gear. |
| Tear-Off Layers | Medium | Removing multiple layers of old shingles increases labor and disposal fees. |
| Local Labor Rates | Medium | Varies by region; Chicago suburbs reflect standard Midwestern union and skilled labor rates. |
A standard roof replacement on a simple, single-story home can often be completed in just one day. Larger, steeper, or more complex architectural designs typically take two to three days. If you select premium materials like standing seam metal, slate, or clay tile, the project timeline can extend to five days or more due to the precise handling and specialized fastening techniques required.
To understand how roof structural designs impact installation costs, refer to our Residential Roof Construction Complete Guide.
Professional Services vs. DIY: An Honest Comparison
While taking on a DIY roof replacement might seem like a great way to save on labor costs, it is a massive undertaking with high stakes.
- Warranty Protection: Most high-grade shingle manufacturers will only honor their lifetime material warranties if the system is installed by a certified, licensed contractor. DIY installations often void these valuable coverages.
- Labor Warranties: Professional roofers back their workmanship with dedicated labor warranties. For example, some retail installation services offer a basic two-year labor warranty, whereas established local contractors like Adept Construction provide robust, long-term workmanship guarantees.
- Safety Hazards: One misstep on a steep slope can result in catastrophic, life-altering injuries. Professional crews are OSHA-compliant, fully insured, and highly experienced in managing high-altitude risks.
- Permits and Building Codes: Most local municipalities in Illinois require building permits and inspections for roof replacements. Unpermitted work can result in fines, delay real estate transactions, or lead to homeowners insurance claim denials.
If you live in our primary service areas, hiring a local expert ensures your home remains safe, code-compliant, and fully protected. Explore our dedicated location resources to learn more about localized services:
- Downers Grove roof replacement
- Naperville roof replacement
- Downers Grove location page
- Naperville location page
To compare local contractors and read verified customer reviews, you can check THE BEST 10 ROOFING IN NAPERVILLE, IL.
Common Mistakes to Avoid During Construction
Even small installation errors can lead to premature roof failure and costly interior water damage. Watch out for these common pitfalls:
- Reusing Old Flashing: To save time and money, some installers reuse old, rusted metal flashing. Always insist on brand-new flashing around chimneys, walls, and valleys.
- Improper Nailing Patterns: Driving nails above the designated nail line, crookedly, or too deep will cause the shingles to slip out of place or blow off in high winds.
- Inadequate Attic Ventilation: A roof needs to breathe. Without balanced intake (soffit) and exhaust (ridge) vents, heat and moisture will build up in your attic, baking your shingles from the inside out and causing premature rot.
- Missing Drip Edge: Skipping the drip edge allows water to run down your fascia boards, leading to wood rot, mold, and basement water intrusion.
- Uneven Shingle Courses: Failing to snap horizontal chalk lines during installation results in wavy, unaligned shingle rows that look unprofessional and compromise water shedding.
Frequently Asked Questions About Roof Replacement
How long does a typical roof installation take?
For most standard-sized residential homes using asphalt shingles, the entire process takes 1 to 2 days. Larger homes with steep slopes, multiple dormers, or alternative materials like standing seam metal can take 3 to 5 days. Severe weather, such as heavy rain or high winds, will delay the timeline.
Can I install new shingles over my existing roof?
While some local building codes allow for a second layer of shingles (an “overlay”), we strongly advise against it. An overlay adds massive weight to your home’s structure, prevents the inspection of the underlying deck for hidden wood rot, and typically voids manufacturer warranties. A complete tear-off is always the safest and most durable choice.
What is the ideal temperature for installing asphalt shingles?
The ideal temperature range is between 50 and 80 degrees Fahrenheit. In cold weather (below 50 degrees), shingles become stiff and brittle, making them prone to cracking when nailed. In hot weather (above 80 degrees), the asphalt softens, making the shingles highly vulnerable to scuffing and tearing under the boots of the installation crew.
Conclusion
A new roof is your home’s primary shield against the elements. Whether you choose standard asphalt shingles or premium standing seam metal, the longevity of your investment depends entirely on the quality of its installation.
At Adept Construction, Inc., we are a family-owned business proud to serve Downers Grove, Naperville, and the surrounding Chicago suburbs. Our knowledgeable staff, superior customer service, and uncompromising workmanship have earned us a reputation for excellence and a steady stream of local referrals.
Ready to protect your home with a roof built to last? Contact us today to schedule your hassle-free, free roofing estimate and learn more about our professional roof installation services.