Ridge Cap Replacement: Don’t Let Your Roof Skills Peak Too Early

replace ridge cap shingles

Why Ridge Cap Shingles Are Your Roof’s Most Vulnerable Point

To replace ridge cap shingles, follow these steps:

  1. Remove the damaged shingle using a flat bar and hammer
  2. Extract all old nails completely
  3. Collect all debris from the roof surface immediately
  4. Inspect the ridge vent underneath for damage
  5. Install the new ridge cap starting from the end opposite the prevailing wind
  6. Overlap each shingle by 5 to 6 inches and nail securely
  7. Seal all exposed nail heads and overlapping edges with roofing cement

You can replace ridge cap shingles without replacing your entire roof — as long as the rest of your shingles are still in good condition.

Knowing how to replace ridge cap shingles is one of the most valuable roofing skills a homeowner can have. Sitting at the very peak of your roof, ridge caps take the full force of wind, rain, UV radiation, and thermal cycling — every single day. That extreme exposure means they typically wear out 3 to 5 years before the rest of your roof surface.

Here’s what makes them especially risky: a damaged ridge cap doesn’t always cause an obvious leak right away. Water can slowly seep in for months before you notice anything inside — by which point you may already have hidden wood rot or mold growing in your attic. Major leaks get noticed and fixed quickly. Minor ones at the ridge don’t.

The good news? If you catch the problem early, replacing a damaged ridge cap is a manageable repair — and it can add years to your roof’s life without the cost of a full replacement. Adept Construction’s professional roofing services cover exactly this kind of targeted, high-impact repair.

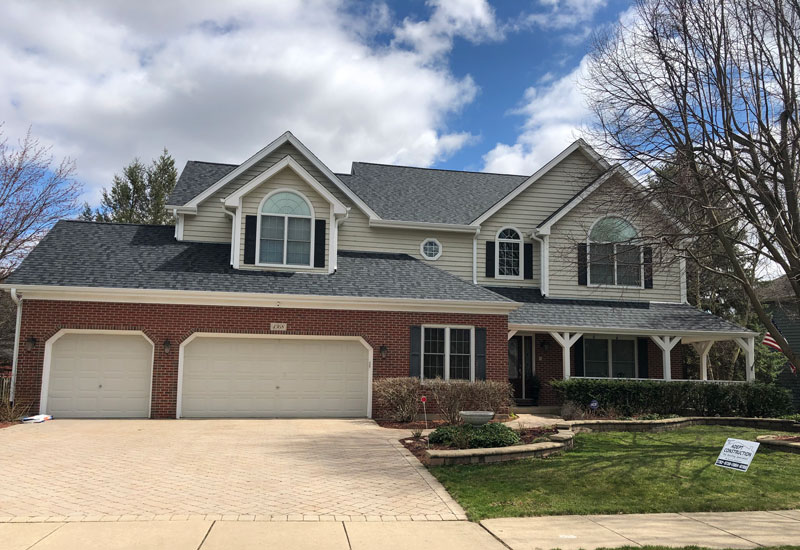
I’m Gerald Michaels, founder and president of Adept Construction, Inc., a family-owned roofing company based in Naperville, Illinois — and after nearly 30 years of replacing ridge cap shingles on homes across Chicago’s western suburbs, I’ve seen how a small repair at the ridge can prevent thousands of dollars in water damage. In this guide, I’ll walk you through everything you need to know to do it right.

Anatomy of a roof ridge showing ridge cap shingles, ridge vent, and underlying structure infographic

Replace ridge cap shingles definitions:

Understanding Ridge Cap Shingles and Signs of Damage

A ridge cap shingle is not just a standard shingle bent over the top of your roof. It is a specially engineered component designed to bridge the gap where two opposing roof slopes meet. This joint is the highest and most vulnerable seam on your home. Without a properly installed ridge cap, rainwater and melting snow would run straight down into your attic, bypassing your main shingles entirely.

Because they sit at the absolute peak, ridge cap shingles endure the highest wind pressures on the entire structure. They are also subjected to intense UV radiation and extreme thermal cycling, heating up under the summer sun and freezing during harsh Illinois winters. This constant stress causes the asphalt mat to dry out, lose its granules, and eventually crack.

Historically, roofers would cut standard 3-tab field shingles into three individual pieces and bend them over the ridge. While this traditional method is still used on budget-conscious projects, modern roofing standards favor manufactured ridge caps. Pre-formed ridge caps are thicker, pre-creased, and made with highly flexible, polymer-modified asphalt that resists cracking. For a detailed breakdown of how these components function, you can read The Roofing Brief’s guide on ridge cap shingles.

When to Replace Ridge Cap Shingles vs. Repairing Them

Determining whether you need a quick patch or a complete ridge line replacement comes down to a thorough visual inspection. You should look for the following five signs of a damaged ridge cap:

  • Cracks and Breaks: Deep splits in the asphalt mat, often caused by thermal expansion or physical impact.
  • Missing Shingles: Sections of the ridge cap that have blown off completely during high wind events.
  • Loose or Exposed Fasteners: Nails that have backed out of the wood deck, leaving open holes for water to enter.
  • Curling or Warping: Edges of the shingles lifting upward, which allows wind-driven rain to blow underneath.
  • Mold, Mildew, or Moss Growth: Green or dark patches along the ridge line, which often indicate trapped moisture and poor ventilation.

If you only have one or two cracked or missing shingles from a recent storm, a targeted repair is highly effective. You can swap out the damaged pieces and extend the life of your roof by several years. However, if the shingles are brittle, curling across the entire peak, or losing granules rapidly, a full ridge cap replacement is necessary. For minor shingle fixes, refer to our guide on Repairing Roof Shingles: A Step-by-Step Guide.

How Ridge Caps and Attic Ventilation Work Together

Your ridge cap shingles do more than shed water; they are a critical component of your home’s attic ventilation system. Most modern homes utilize a ridge vent system. This is a continuous opening cut into the roof deck along the peak, covered by a plastic or aluminum venting unit.

The ridge cap shingles are installed directly over this vent. This setup allows hot, humid air to rise naturally out of your attic while preventing rain, snow, and pests from entering.

Attic ventilation airflow cycle through soffit and ridge vents

There are two primary types of ridge vents:

  1. Shingle-Over Ridge Vents: Made of durable molded plastic, these low-profile vents are covered with matching ridge cap shingles, making them virtually invisible from the ground.
  2. Aluminum Ridge Vents: Metallic vents that sit on top of the ridge. While functional, they are highly susceptible to denting from hail or branches and are generally considered less aesthetically pleasing.

Proper ventilation prevents moisture buildup in the winter, which can lead to wood rot and mold, and keeps your attic cooler in the summer, lowering your energy bills. In cold climates like Naperville and Downers Grove, balanced ventilation is also your primary defense against ice damming.

Preparing for Ridge Cap Replacement

Before you grab your ladder, you must prioritize safety. Working on the peak of a roof is inherently hazardous. You are at the highest point of the structure, and any slip can result in a serious fall.

Always wear soft-soled work shoes with excellent traction. If your roof has a pitch of 4:12 or steeper, you must use a properly anchored safety harness. Never work on a wet, icy, or damp roof.

Additionally, be mindful of debris. When you pry up old shingles, loose asphalt granules will spill out onto the roof slopes. These granules act like tiny ball bearings under your feet. Stepping on a pile of loose granules can cause an immediate slip, so clear away debris as you work.

Essential Tools Needed to Replace Ridge Cap Shingles

Having the correct tools on hand will ensure the job goes smoothly and looks professional. Gather the following items before starting:

  • Flat Bar / Pry Bar: Essential for gently lifting shingles and extracting old roofing nails.
  • Hammer: A standard claw hammer or a specialized roofing hammer.
  • Caulk Gun & High-Quality Roof Sealant: For sealing nail heads and securing shingle edges.
  • Utility Knife: With heavy-duty blades to cut and trim shingles.
  • Chalk Line: To ensure your new ridge caps are aligned perfectly straight.
  • 2-Inch to 3-Inch Roofing Nails: You will need longer nails than standard 1.25-inch shingle nails because they must penetrate through the ridge cap, the underlying ridge vent, and into the wood decking by at least 3/4 of an inch.

Choosing the Right Ridge Cap Material

Selecting the right material is vital for both the longevity of your roof and your manufacturer’s warranty. While you can technically cut standard 3-tab shingles to save money, we strongly advise against it for modern roofs. Standard architectural (laminated) shingles are too thick and rigid to bend over a peak; forcing them to bend will crack the asphalt mat immediately, leading to early failure.

Furthermore, major shingle manufacturers require you to use their matching, pre-formed ridge cap products to maintain their extended system warranties. Mixing brands — such as placing GAF ridge caps over Owens Corning field shingles — can void your warranty. When selecting materials, always match the brand, color, and thickness of your existing shingle roofing systems.

Step-by-Step Guide: How to Replace Ridge Cap Shingles

Replacing a ridge cap requires precision, patience, and a methodical approach. Follow these step-by-step instructions to ensure a watertight installation. For further reading on standard peak finishing, you can consult HGTV’s guide on replacing ridge-cap shingles and our comprehensive The Step-by-Step Guide to Replacing Damaged Roof Shingles.

Step 1: Remove the Damaged Ridge Cap Shingles

Carefully slide your flat bar under the exposed edge of the damaged ridge cap shingle. Gently pry upward to loosen the sealant bond. Locate the nails holding the shingle in place — there are typically two to four nails per piece. Slide the flat bar under the nail heads and pry them out completely. Do not simply drive old nails deeper into the deck, as they can puncture your new shingles from underneath.

Step 2: Clean the Area and Manage Debris

Remove all loose shingles, old nails, and dried roofing cement from the work area. Use a hand broom to sweep away loose granules and dirt. Collect all debris immediately in a bucket to keep your work surface clean and slip-free.

Step 3: Inspect and Repair the Ridge Vent

If your home has a ridge vent, inspect the exposed section. If the plastic vent is cracked, crushed, or warped, cut out the damaged portion using a utility knife and replace it with a new section of venting. If the vent is in good condition, seal any old nail holes with a dab of high-quality roof sealant.

Step 4: Establish Alignment and Determine Wind Direction

To ensure your new ridge line is perfectly straight, measure down 5.5 inches from the peak on one side and snap a chalk line along the length of the ridge.

Next, determine the prevailing wind direction in your area. You must install your ridge cap shingles starting from the end of the roof opposite the prevailing wind (the leeward side). This ensures that the overlapping edges of the shingles face away from the wind, preventing heavy gusts from catching the edges and tearing them off.

Step 5: Install the Starter Shingle and Successive Pieces

Cut the tab portion off a ridge cap shingle to create a flat starter piece. Nail this starter piece down at the leeward end of the ridge.

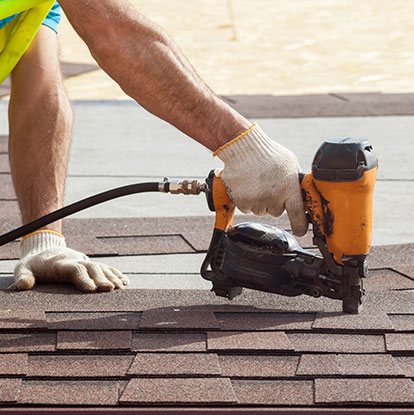
Next, place your first full ridge cap shingle directly over the starter. Drive two nails into the shingle, one on each side, positioned 1 inch from the outer edges and roughly 5.5 to 6 inches from the exposed end (just behind the exposure line).

Proper nailing and overlap alignment for ridge cap shingles

Overlap the next shingle by 5 to 6 inches, completely covering the nails of the previous piece. Continue this pattern along the ridge, aligning each piece with your chalk line.

Step 6: Seal the Final Piece

When you reach the windward end of the ridge, you will have to install a final cap shingle. Because there is no subsequent shingle to cover the nails on this last piece, you must secure it with roofing cement. Apply a generous amount of high-quality roof sealant under the final piece, press it firmly into place, and nail it down. Cover the exposed nail heads with a thick dab of roofing cement to prevent water intrusion.

Comparison of Ridge Cap Options

FeaturePre-Manufactured Ridge CapsHand-Cut 3-Tab Shingles
Material ThicknessThicker, polymer-modified asphaltStandard single-layer asphalt
FlexibilityPre-creased; highly resistant to crackingRigid; prone to cracking when bent
Lifespan25 to 50 years (matches main roof)5 to 8 years
Wind ResistanceHigh (up to 110–150 mph)Low (prone to blow-offs)
Warranty StatusKeeps manufacturer system warranty intactOften voids extended manufacturer warranties
Material Cost$3.00 – $6.00 per linear foot$2.00 – $3.00 per linear foot

Cost and Professional Considerations for Ridge Cap Projects

Understanding the financial aspects of ridge cap replacement can help you budget effectively. On average, a professional roof ridge cap replacement costs between $500 and $1,200, or $6 to $14 per linear foot, depending on the roof pitch, height, and chosen materials. Upgrading to a vented ridge cap system typically averages around $720 ($10 to $14 per linear foot).

If you are looking at minor repairs (such as replacing a few missing shingles or clearing clogged vents), the cost generally ranges from $2 to $6 per linear foot, with most professional repair bills landing between $200 and $750 (national average of $475). Labor typically accounts for 60% to 80% of the total project cost because working on a high peak requires specialized safety setups and slower, more meticulous movement.

While DIY installation can save you money upfront, it comes with significant risks:

  1. Safety Hazards: Falling from a roof peak can result in catastrophic injury.
  2. Voided Warranties: Imprecise installation or mixing shingle brands will void your manufacturer’s material warranty.
  3. Insurance Issues: Many homeowner’s insurance policies will not cover future water damage if repairs were performed by an unlicensed individual.

When to Hire a Professional Roofer in Illinois

Our local weather in northern Illinois is uniquely tough on roofing systems. The Chicago western suburbs experience intense freeze-thaw cycles, heavy snow loads, and severe spring windstorms. These conditions put immense stress on the roof peak, making proper installation absolutely critical to prevent ice dams and wind damage.

Professional roofer inspecting a residential roof ridge cap

In Illinois, roofing contractors must be licensed by the state. Hiring a licensed professional ensures that the work complies with local building codes, such as installing ice and water barriers 24 inches up from the eaves and utilizing correct ventilation standards. A professional roof inspection (which typically costs $125 to $350) can identify hidden deck damage, moisture in the attic, or failing flashing before they turn into expensive emergencies.

If you suspect your ridge cap is failing, we provide expert roofing services across our local service areas:

To learn more about our local services, visit our dedicated Downers Grove service area and Naperville service area pages.

Frequently Asked Questions about Ridge Cap Shingles

Do I need to replace the ridge vent when replacing ridge cap shingles?

No, you do not need to replace your ridge vent unless it has sustained physical damage. If the existing plastic or aluminum vent is structurally sound, free of cracks, and not warped, you can leave it in place. Simply remove the old shingles, extract the nails, seal the old nail holes with high-quality roofing sealant, and install the new ridge cap shingles directly over the existing vent. However, if the vent is dented, torn, or crushed, you should replace that section to maintain proper attic ventilation.

Can I replace ridge cap shingles without a full roof replacement?

Yes, you can absolutely replace just the ridge cap shingles without replacing the entire roof. This targeted maintenance is highly effective if your main field shingles are still in good condition but the ridge caps have worn out prematurely due to extreme wind and sun exposure. When performing a partial replacement, take care to match the brand, style, and color of your existing shingles as closely as possible to maintain your home’s curb appeal.

How many nails are required per ridge cap shingle?

Standard building codes (including IRC R905.2.8.3) specify a minimum of two nails per ridge cap shingle, placed 1 inch from each side edge and just behind the exposure line so they are covered by the next overlapping shingle. However, in high-wind regions or areas prone to severe storms, we recommend a four-nail pattern combined with a bead of asphalt roof cement under the leading edge of each shingle to prevent wind uplift.

Conclusion

A newly completed roof ridge cap with matching shingles and perfect alignment

Your roof’s ridge cap is the ultimate line of defense against the elements. While it represents only a small portion of your overall roof surface, a single damaged or missing ridge shingle can lead to quiet, slow-moving water leaks, mold growth, and structural wood rot in your attic. Performing annual inspections and addressing minor damage promptly is the best way to avoid premature roof failure and protect your investment.

At Adept Construction, Inc., we have spent decades serving our neighbors in Downers Grove, Naperville, and the surrounding Chicago suburbs. As a family-owned roofing company, we pride ourselves on superior customer service, knowledgeable staff, and high-quality workmanship. Whether you need a simple ridge cap repair or a complete residential roofing system upgrade, our team is here to help.

Don’t wait for the next major storm to test your roof’s peak. Contact us today at Adept Construction, Inc. to schedule your professional inspection and get a free estimate!

Recommended Posts