
Why Knowing How to Replace Roofing Shingles Can Save Your Home Thousands
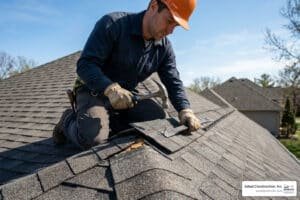
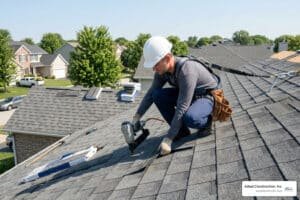
Knowing how to replace roofing shingles is one of the most practical skills a homeowner can have — and acting fast with expert roofing repair services on even a single damaged shingle can prevent leaks, rot, and costly structural repairs down the road.
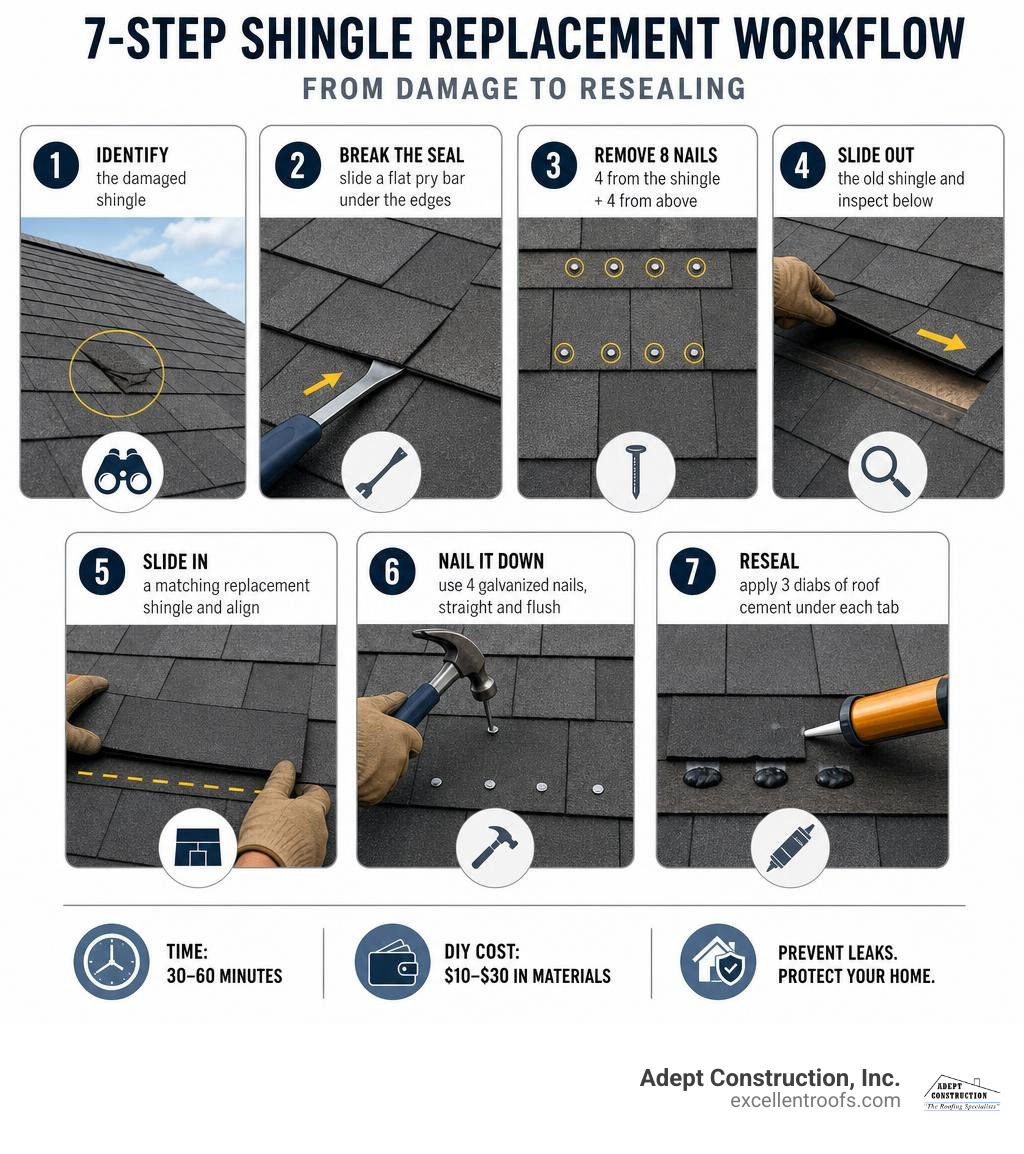
Here is a quick overview of the full process:
- Identify the damaged shingle from the ground using binoculars
- Break the sealant bond by sliding a flat pry bar under the shingle edges
- Remove all 8 nails — 4 from the damaged shingle’s own nail line, plus 4 from the overlapping course above
- Slide out the old shingle and inspect the underlayment beneath
- Slide in a matching replacement shingle and align it with the exposure line
- Nail it down with 4 galvanized roofing nails, driven straight and flush
- Reseal by applying 3 dabs of asphalt plastic roof cement under each tab
A single shingle repair typically takes 30 to 60 minutes and costs as little as $10 to $30 in materials — compared to $150 to $400 if you call a professional for just one shingle. That said, knowing when to stop and call a pro is just as important as knowing how to do the repair itself.
Asphalt shingle roofs are built to be low-maintenance. But when a tree branch falls, wind catches a corner, or a hailstorm rolls through, even one compromised shingle can let water into your home before you notice a thing. The good news: individual shingle replacement is one of the most straightforward DIY fixes a homeowner can tackle — if the damage is isolated and caught early.
I’m Gerald Michaels, founder of Adept Construction, Inc., and with nearly three decades of hands-on roofing experience across Chicagoland, I’ve seen how a timely understanding of how to replace roofing shingles can be the difference between a $25 fix and a $25,000 problem. In this guide, I’ll walk you through every step — from breaking the sealant bond to final inspection — so you can approach this repair with confidence.
How to replace roofing shingles glossary:
Essential Tools, Safety Precautions, and Area Preparation
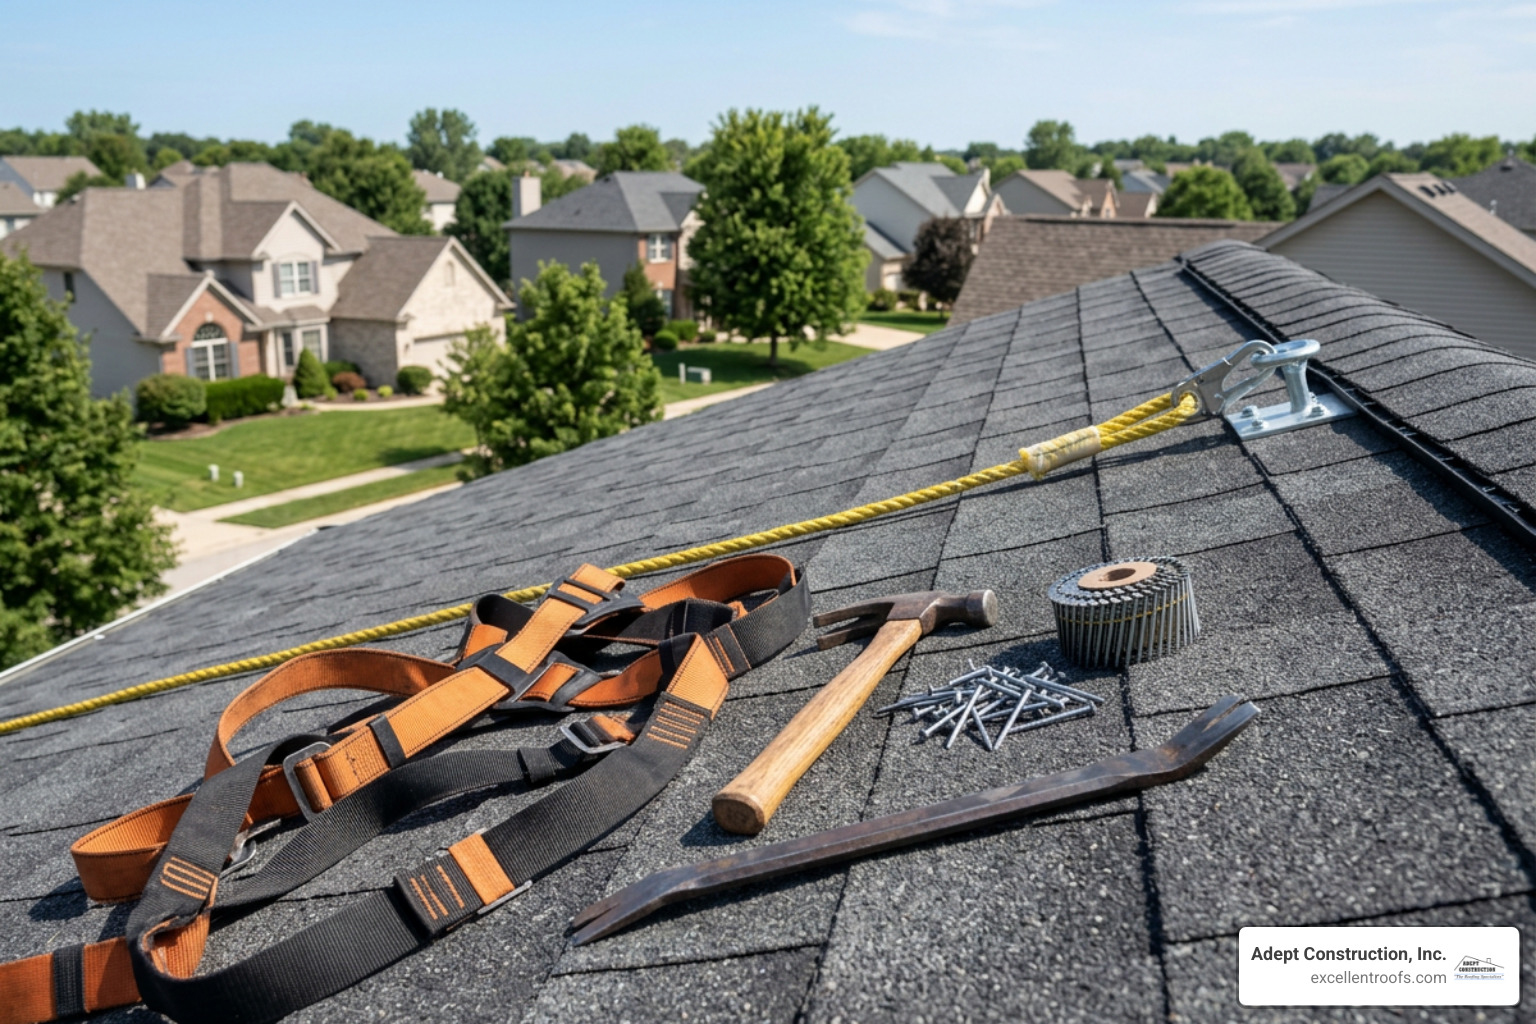
Before you step foot on a ladder, gathering the correct tools and setting up uncompromising safety measures is essential. Roof repairs are straightforward, but working at elevation requires absolute respect for physics and safety regulations. According to national safety data, one-third of all construction-related fatalities stem from falls off roofs. Prioritizing your fall protection system protects you from preventable injuries.
Essential Tools and Materials
To complete a clean single-shingle replacement, assemble the following materials before beginning:
- Flat pry bar (or roofer’s pry bar): Essential for breaking asphalt seals and lifting nails without gouging shingles.
- Standard claw hammer or roofing hammer: Used for pulling fasteners and driving new roofing nails flush.
- 1-1/4 inch galvanized roofing nails: Corrosion-resistant nails designed specifically for asphalt shingles.
- Asphalt plastic roof cement: Available in a cartridge tube or small tub to manually reseal tabs.
- Putty knife: Useful for delicate scraping and spread-applying roof cement beneath tabs.
- Replacement shingles: Exact style, dimensions, and color match for your existing installation.
- Scrap plywood sheet: Placed underfoot to distribute weight and avoid scuffing fragile granules.
Safety Non-Negotiables
Never compromise on proper roofing safety. When working on any sloped surface, strictly enforce these core protocols:
- Fall Protection Harness: Wear an OSHA-compliant fall-arrest harness tethered securely to an approved ridge anchor point whenever working above ground level.
- The 4:1 Ladder Rule: Set your extension ladder on firm, level ground. For every 4 feet of vertical height to the roof edge, position the ladder base 1 foot out from the wall. Ensure the ladder extends at least 3 feet above the gutter line for safe mounting and dismounting.
- Non-Slip Footwear: Rubber-soled work boots with deep tread provide maximum traction on textured asphalt granules.
- Weather Watch: Never attempt roof repairs in rainy, icy, or excessively windy weather. Wet granules convert your roof into a hazard zone.
For localized structural evaluations or comprehensive roof integrity assessments across northern Illinois, working with a team skilled in residential roofing ensures your roof deck remains completely sound before any minor repair begins.
How to Replace Roofing Shingles: Step-by-Step Removal and Installation
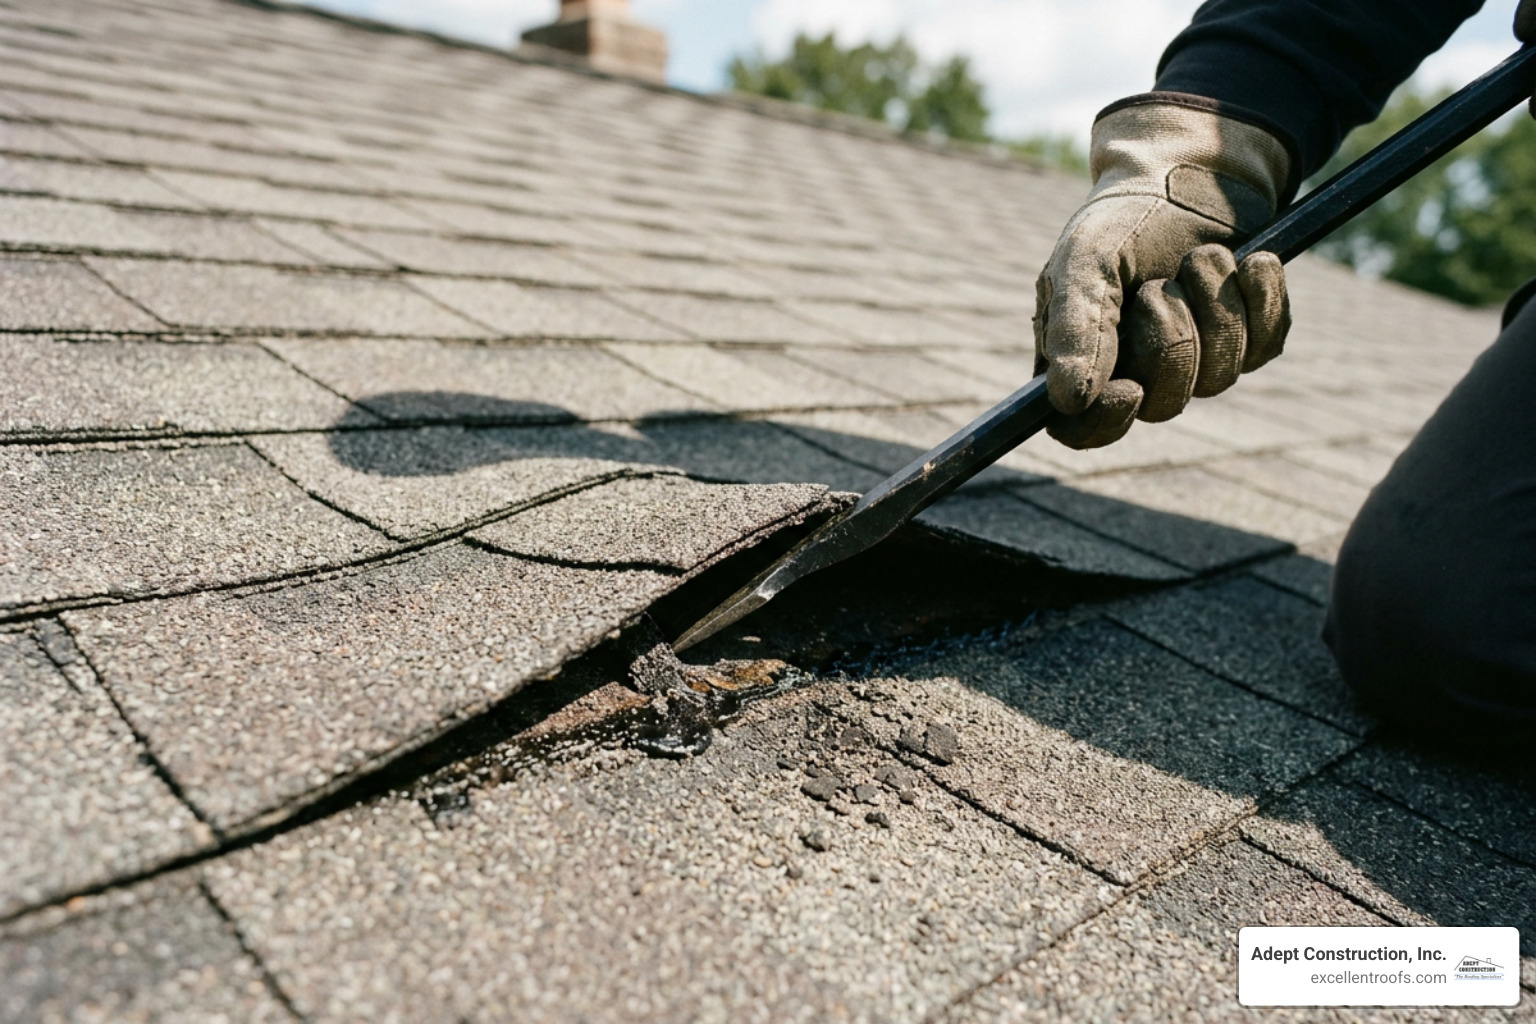
Replacing an asphalt shingle is a precise, seven-step process. While the work itself is manageable, skipping subtle structural steps—such as pulling upper-layer fasteners or properly resetting seals—can allow wind uplift to tear your work away during the next storm.
For comprehensive reference and DIY context, consult the How to Replace Damaged Shingles Guide to review baseline industry standards.
Breaking Sealant Bonds and Pulling Fasteners
To remove a target shingle, you must understand how asphalt shingle courses overlap. Each standard 3-tab or architectural shingle is secured by its primary nailing line, but it is also pinned through its upper margin by the nails of the course directly above it. Consequently, taking out one single shingle requires releasing fasteners from two separate courses of shingles.
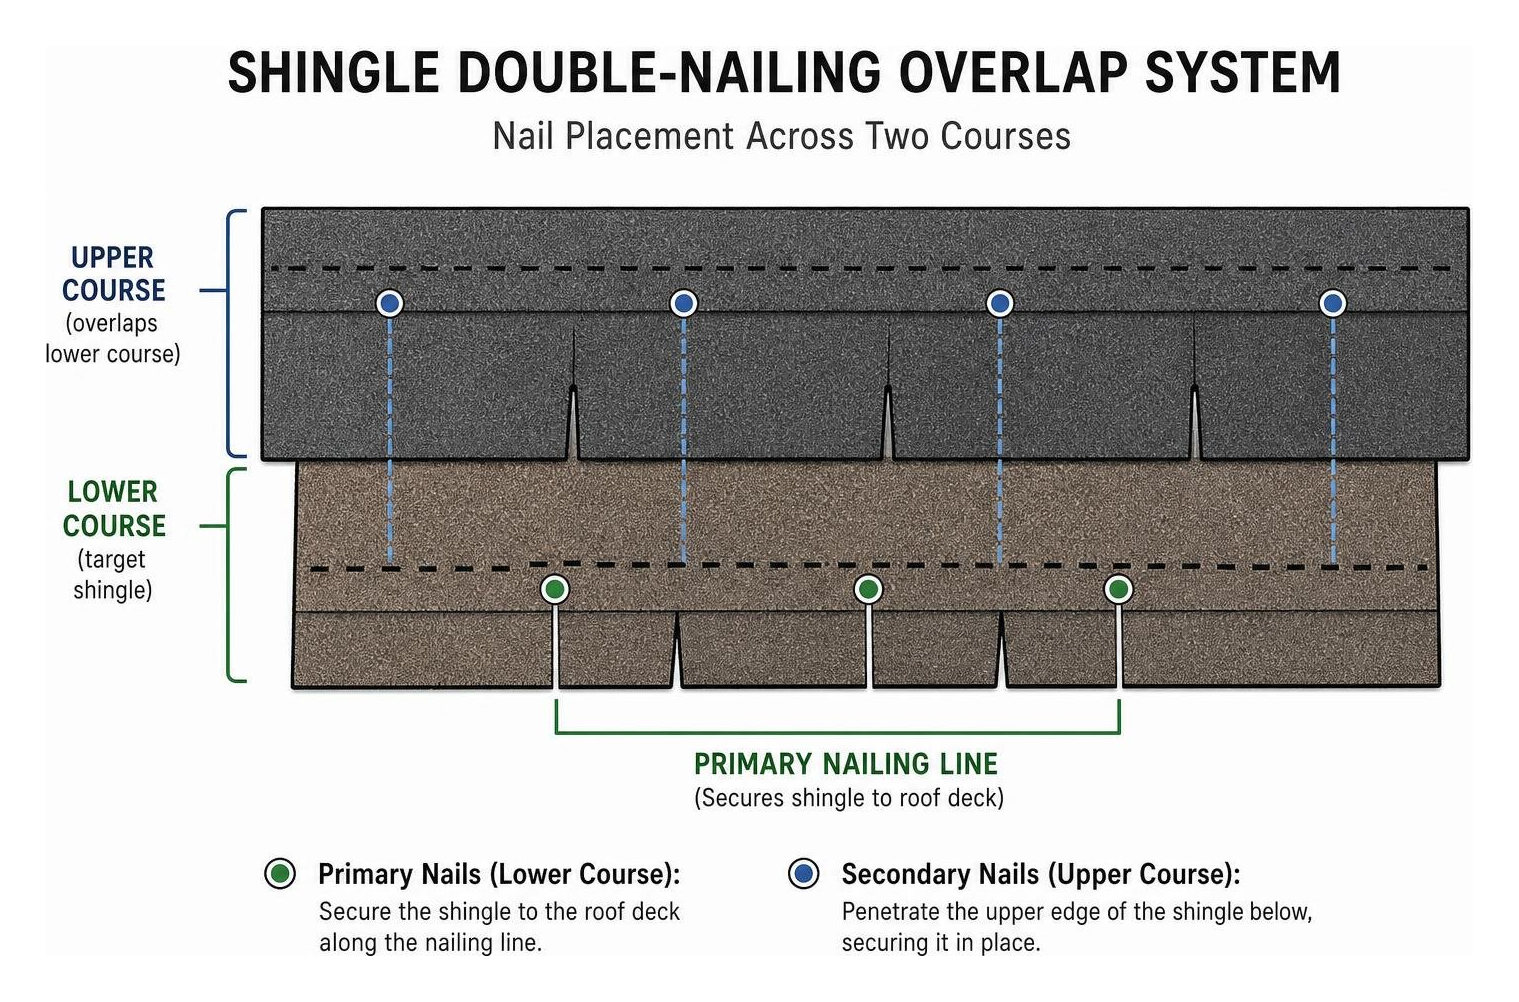
To break sealant bonds and remove fasteners safely:
- Break the Target Seal: Gently insert your flat pry bar underneath the bottom edge of the damaged target shingle. Slide the bar flat along the adhesive strip to shear the factory thermal bond without tearing the surrounding asphalt mat.
- Break Adjacent Seals: Slide the pry bar under the shingles in the course directly above the target shingle, as well as the course two rows up. Carefully break their bonds so you can lift those tabs without snapping them.
- Lift Nails from Below: To preserve the granular surface layer, never pry nails from above through the face of the shingle. Instead, slide your pry bar under the target shingle right next to a nail shank, lift up gently on the shingle itself to pop the nail head up, then push the shingle back down and pull the exposed nail shank with your hammer’s claw.
- Remove Upper Layer Fasteners: Repeat this prying process for the four nails located in the course directly above the damaged shingle. In total, you must pull 8 nails to completely free one standard 3-tab shingle.
If you want a deeper look at proper layout patterns, our guide on how to install asphalt shingles step by step breaks down fastening mechanics in complete detail.
How to Replace Roofing Shingles with New Fasteners and Alignment
Once all eight nails are pulled, slide the damaged shingle straight downward to remove it. Take a moment to thoroughly inspect the exposed felt underlayment and roof sheathing beneath. If you discover moisture staining, rotted plywood, or torn underlayment, patch the underlayment with asphalt cement before proceeding.
Follow these direct steps for proper insertion and fastening:
- Position the Replacement: Slide the new shingle upward into the slot until its upper edge meets the top alignment mark and its bottom edge sits flush with the horizontal exposure line of adjacent shingles.
- Verify Sizing and Cutout Lines: Ensure the vertical alignment lines up exactly with neighboring shingles to maintain the required 6-inch staggered seam offset across courses.
- Drive New Roofing Nails: Drive four 1-1/4 inch galvanized roofing nails across the designated nail strip, located roughly 1 inch above the cutout slots. Drive nails straight and flush with the shingle face—never sink them so deep that they break through the mat, and never leave them sticking up where they could puncture the overlying tab.
- Re-Nail the Course Above: Lift the overlying shingle tabs and drive four new nails through their original nailing line, securing both the upper course and the upper margin of your new shingle beneath.
For more insights into handling delicate fast-fitting repairs, explore the Replacing an Asphalt Shingle Overview.
Manual Resealing and Final Inspection
New asphalt shingles rely on thermal self-sealing strips that melt under direct sunlight to bond tabs together. However, because a replacement shingle’s factory adhesive may be coated with dust or installed during cooler weather, you must manually reseal the tabs to ensure immediate wind resistance.
- Apply Roof Cement: Lift each tab of the new shingle and use a putty knife to apply three quarter-sized spots of asphalt plastic roof cement under each tab. Avoid over-applying cement, as excess solvent can cause asphalt shingles to blister or curl over time.
- Reseal Surrounding Tabs: Apply dabs of roof cement under any adjacent or upper shingle tabs whose factory seals were broken during the tear-out process.
- Press Firmly: Press all lifted tabs down firmly into the adhesive bed.
- Final Work Inspection: Step back to verify that all courses lay completely flat, no nail heads remain exposed, and all surrounding granules remain intact.
For further maintenance advice, refer to our comprehensive article on repairing roof shingles step by step.
Optimal Weather Conditions and Shingle Color Matching
Executing roof repairs during inappropriate weather leads to damaged materials and compromised structural seals. Asphalt shingles are flexible composite items highly sensitive to ambient temperature.
Temperature Thresholds for Repair
- Ideal Range (60°F to 80°F): Asphalt remains flexible, allowing you to lift tabs easily without cracking the mat, while thermal strips adhere reliably.
- Cold Weather (< 50°F): Cold asphalt turns brittle. Bending stiff shingles to reach hidden nails frequently causes full tab snaps.
- Hot Weather (> 80°F): Extreme summer heat softens asphalt, making shingles gooey and extremely susceptible to scuffing underfoot or tearing during pry-bar work.
How to Replace Roofing Shingles in Optimal Weather
Plan your repair project around moderate climate windows. In Chicagoland, spring and early autumn provide ideal temperature ranges for exterior roofing work. If emergency fixes are required during summer heat waves, work during early morning hours before direct sunlight bakes the roof surface.
When matching replacement shingles on older roofs, keep in mind that sun exposure and ultraviolet rays naturally fade asphalt granules over time. A brand-new shingle straight from a fresh bundle will look slightly darker than weathered surrounding materials. To blend the patch:
- Source replacement shingles from the same manufacturer, product line, and color name whenever possible.
- Pull replacement pieces from spare bundles left over from your roof’s original installation.
- Position replacement shingles in slightly shaded roof valleys or less visible areas if you must swap an weathered shingle into a prominent front-facing slope. Within several months of sun exposure, natural weathering typically evens out minor color shifts.
DIY Single Shingle Repair vs. Professional Roof Replacement
While replacing 1 to 3 isolated shingles is a great DIY weekend project, widespread structural deterioration calls for comprehensive contractor intervention. Knowing where DIY boundaries end protects both your home’s structural value and your personal safety.
| Feature / Criteria | DIY Single Shingle Repair | Professional Roof Replacement |
|---|---|---|
| Project Scope | 1 to 3 damaged or missing shingles | Widespread damage, aging system, widespread leaks |
| Material Cost | $10 – $30 per shingle | $10,000 – $15,000 full installation average |
| Labor Cost | $0 (Self-executed) | $150 – $400 for small repairs; 40–60% of total bill for full jobs |
| Time Required | 30 to 60 minutes per shingle | 1 to 3 days professional installation |
| Material Lifespan | Extends local patch spot | 15–20 years (3-tab); 25–30 years (architectural) |
| Safety Risk | Moderate (requires harness & ladder care) | Low for homeowner (handled by insured crews) |
| Structural Warranty | None (DIY workmanship) | Full manufacturer and labor warranties |
When to Call a Professional Contractor
If your roof exhibits any of the following warning signs, individual patching is no longer viable and a complete system replacement is required:
- Widespread Aging: Standard 3-tab shingles last 15 to 20 years, whereas architectural shingles last 25 to 30 years. If your roof is approaching these age limits and curling across multiple slopes, spot fixes won’t stop widespread failure.
- Rotted Decking: Soft spots, sagging ridgelines, or spongy wood sheathing indicate deep moisture rot that requires full tear-offs down to the deck boards.
- Multiple Layers: Building codes restrict homes to a maximum of two roof covering layers. If your home already has two layers installed, local codes prohibit additional recovers, making a total tear-off mandatory.
- Storm and Wind Destruction: Severe storm cells often lift entire sections of roofing. If you are dealing with major storm impact in Downers Grove, IL, relying on our team serving the Downers Grove IL service area for roof repair in Downers Grove IL or roof replacement in Downers Grove IL ensures proper structural insurance documentation and execution.
Likewise, homeowners facing storm damage in our Naperville IL service area can trust our dedicated services for roof repair in Naperville IL and complete roof replacement in Naperville IL to restore their property safely.
Frequently Asked Questions About Roof Shingle Replacement
How long does it take to replace a single damaged shingle?
Replacing a single damaged shingle typically takes between 30 and 60 minutes for a homeowner with basic tools and safety gear. This duration includes setting up an extension ladder, safely securing a fall-arrest harness, breaking adjacent sealant bonds, removing all 8 fasteners, sliding in the new shingle, driving replacement nails, and manually applying asphalt plastic roof cement beneath the tabs.
How many nails hold a single asphalt shingle in place?
A single standard asphalt shingle is held in place by 8 nails total. While four primary nails are driven directly into its own fastening strip roughly 1 inch above the cutouts, four additional nails driven into the course directly above penetrate through its upper edge layer. Releasing both sets of fasteners is required to pull the shingle free without tearing adjacent materials.
Can I install new shingles directly over old damaged shingles?
While local building codes permit a maximum of two roofing layers (a process known as a recover), installing new shingles directly over old, curled, or water-damaged shingles is generally discouraged. Recovering traps hidden structural rot, prevents inspection of underlying plywood decking, and can invalidate manufacturer warranties. Performing a complete tear-off down to the roof sheathing remains the most reliable long-term installation strategy.
Conclusion
Understanding how to replace roofing shingles gives you the knowledge to handle minor storm impacts, protect your roof deck, and prevent minor leaks from spiraling into massive water damage. By using proper safety equipment, carefully pulling fasteners across two overlapped courses, and applying asphalt plastic roof cement to re-establish wind resistance, you can keep your roof operating at peak performance for years to come.
However, when damage extends beyond a few missing shingles, or when aging materials reach the end of their service lifespan, working with trusted local professionals makes all the difference. At Adept Construction, Inc., our family-owned team brings decades of local experience, superior craftsmanship, and unmatched customer care to every home across Downers Grove, Naperville, and surrounding Chicagoland communities.
If you suspect your roof needs more than a simple patch, don’t wait for the next storm to test your home’s defenses. We offer free estimates on all roofing projects—contact us today for a free estimate and ensure your property remains completely leak-free!