
What Happens When You Ignore a Missing Shingle (And How to Fix It Fast)
Replacing missing roof shingles is a repair most homeowners can handle themselves — if the damage is small, the roof is in good shape, and they have the right tools and safety gear.
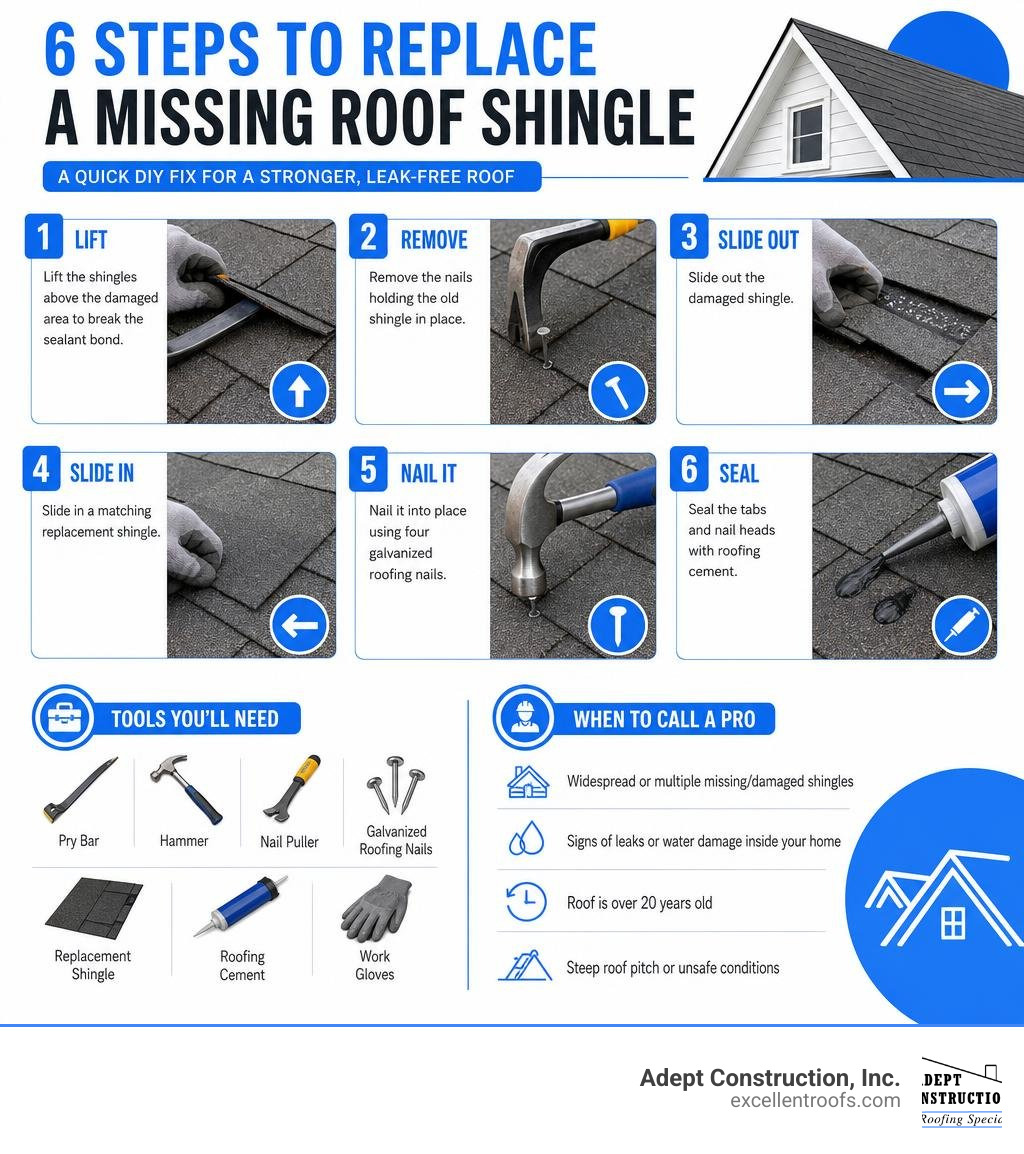
Here’s the quick answer:
- Lift the shingles above the damaged area to break the sealant bond
- Remove the nails holding the old shingle in place
- Slide out the damaged shingle
- Slide in a matching replacement shingle
- Nail it into place using four galvanized roofing nails
- Seal the tabs and nail heads with roofing cement
Most repairs take 30 to 60 minutes and cost between $10 and $30 in materials. If damage is widespread, or the roof is over 20 years old, a full replacement may be the smarter call — but for isolated missing shingles, a targeted DIY fix works well.
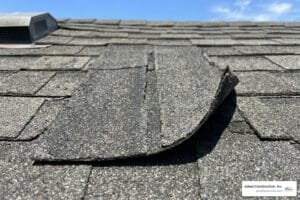
That said, even one missing shingle matters. Wind and hail account for over 50% of residential insurance claims, and just one inch of water intrusion can cause up to $25,000 in structural damage. The underlayment beneath your shingles is not designed for long-term exposure — once a shingle goes missing, the clock starts ticking.
Whether a storm blew one off overnight or you spotted a bare patch during a routine check, acting quickly protects your home from leaks, mold, and costly structural repairs. This guide walks you through everything you need to know — from tools to step-by-step installation — so you can make a confident decision about whether to DIY or call in a professional roofing contractor.
I’m Gerald Michaels, founder of Adept Construction, Inc., and I’ve spent nearly three decades replacing missing roof shingles and restoring roofs across Chicago’s western suburbs. I’ll share exactly what my team looks for on every repair — so you can approach this project with the same confidence.
Discover more about replacing missing roof shingles:
Is Replacing Missing Roof Shingles a Viable DIY Project?
Before you grab your ladder and head up to the roof, it is essential to evaluate whether a DIY spot repair is actually the best path forward. For many homeowners in Downers Grove, IL and Naperville, IL, a localized fix makes perfect financial sense. However, the viability of a DIY repair depends heavily on the age of your roof, the extent of the damage, and your comfort level with heights.
A single missing shingle or a small cluster of damaged shingles (under 3 shingles in total) on a relatively young roof is one of the absolute best candidates for a DIY home maintenance project. It requires minimal technical skill, costs very little in materials, and can save you hundreds of dollars compared to a professional service call.
However, if your roof is showing systemic signs of wear or has suffered widespread storm damage, patching individual spots is often just a temporary band-aid. The following table provides a clear comparison to help you decide whether to attempt a spot repair yourself or plan for a complete system overhaul:
| Factor | Spot Repair (DIY or Professional) | Full Roof Replacement |
|---|---|---|
| Roof Age | Best for younger roofs (under 10–15 years old) | Recommended for older roofs (15–20+ years old) |
| Damage Extent | Isolated to 1–3 missing or damaged shingles | Widespread damage affecting 25% or more of the roof |
| Primary Cause | Localized wind lift, pest damage, or falling debris | Systemic wear, widespread granule loss, curling, or aging |
| Estimated Cost | $10–$30 (DIY) or $150–$400 (Professional) | Average of $18,923 for a full residential asphalt roof |
| Underlying Decking | Clean, dry, and structurally sound | Spongy, rotting, or showing signs of water damage |
| Aesthetic Match | May result in minor color variations due to UV fading | Perfect uniform appearance across the entire home |
If your roof is approaching the end of its natural lifespan, pouring money and effort into minor patches can be a classic case of throwing good money after bad. Old shingles lose their flexibility, making them brittle and highly susceptible to cracking when you try to lift them for repairs. In these cases, consulting a professional about a shingle roof replacement complete guide is the most cost-effective long-term strategy.
On the other hand, if your roof is relatively new and a stray summer storm simply managed to peel back a couple of tabs, performing a quick spot repair will protect your home’s envelope without breaking the bank. You can read more about evaluating these trade-offs in our guide on patching up the real cost of replacing a handful of shingles.
Step-by-Step Guide to Replacing Damaged Asphalt Shingles
If you have decided that a DIY repair is the right choice for your roof, the key to success lies in understanding the physical mechanics of how asphalt shingles are secured. Shingles are not installed as isolated pieces; they overlap systematically.
Each individual shingle is typically secured by a row of four to six nails driven through its nailing strip. Crucially, the nails driven into the shingle course directly above also penetrate the upper edge of the shingle below. This means that to remove a single shingle, you must locate and extract two rows of nails without tearing the surrounding materials.
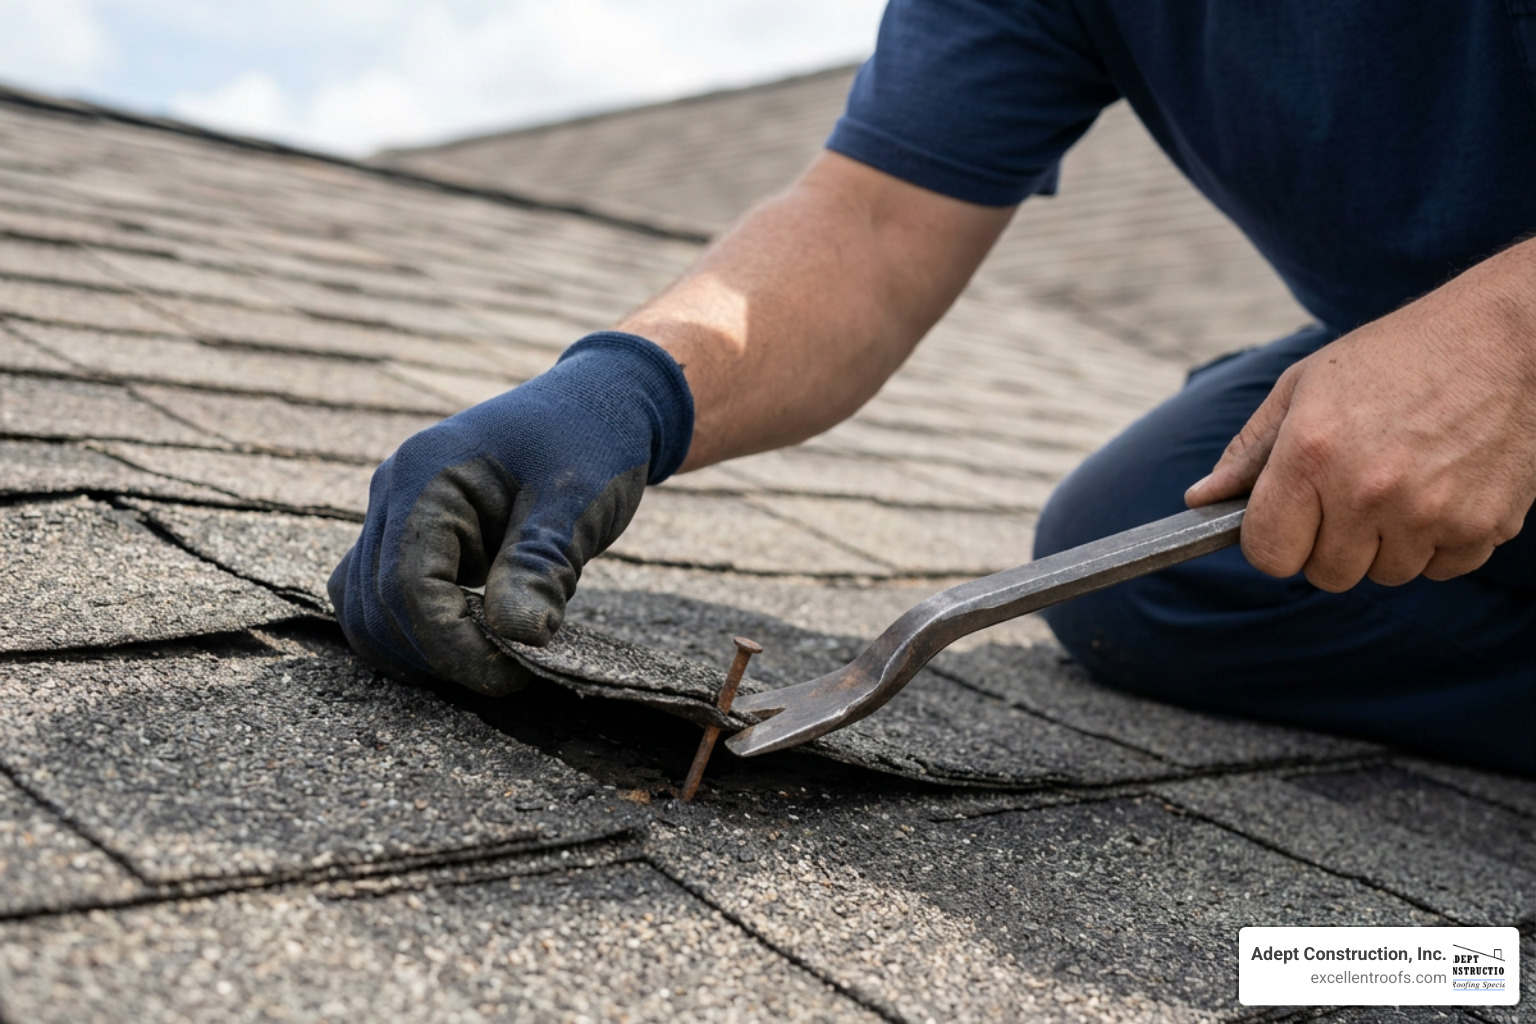
To perform this repair safely and cleanly, we recommend following a systematic process. For additional background on the tools and materials used in professional settings, you can reference the How to Replace Damaged Shingles | Step-by-Step DIY Guide | Roofs Wiki or explore our detailed breakdown on the step-by-step guide to replacing damaged roof shingles.
Preparing Tools and Safety Gear for Replacing Missing Roof Shingles
Safety must always be your absolute top priority when working on a roof. A fall from even a single-story roof can result in severe, life-altering injuries. Before you begin, gather the necessary safety equipment and tools.
Required Safety Gear:
- A sturdy extension ladder (set up using the 4:1 safety rule: for every 4 feet of height, the base should be 1 foot away from the wall).
- A properly anchored roof safety harness (highly recommended for steep slopes).
- Rubber-soled, non-slip work shoes to maintain traction.
- Heavy-duty work gloves and safety glasses.
Essential Toolkit:
- A flat pry bar (often called a “wonder bar” or roofing pry bar).
- A standard claw hammer.
- A utility knife (preferably with a hook blade for clean cuts).
- A caulking gun loaded with high-quality asphalt plastic roof cement.
- 1.25-inch galvanized roofing nails (corrosion-resistant with wide flat heads).
- Matching replacement shingles.
Always choose a calm, dry day for this project. Never attempt roof repairs in the rain, when frost is present, or during high winds. For a deeper dive into preparing your work area, consult our article on repairing roof shingles: a step-by-step guide.
Removing the Damaged Shingle and Preparing the Deck
Once you are safely positioned on the roof, your first task is to release the damaged shingle from its neighbors without causing further tearing.
- Break the Sealant Bonds: Asphalt shingles feature a self-sealing adhesive strip that bonds them to the course below. Slide your flat pry bar carefully under the tabs of the shingles directly above the damaged area. Gently lift the pry bar to break the adhesive seal. You will need to break the seals on the target shingle as well as the shingles in the row immediately above it.
- Locate and Extract the Nails: Slide the pry bar under the damaged shingle, centering it beneath a nail head. Gently pry upward to lift the nail slightly. Once the nail head pops up, slide the bar out, press the shingle flat, and use the claw of your hammer or the pry bar to pull the nail completely out. Repeat this process for all four nails on the target shingle.
- Remove the Overlying Nails: Because the shingles in the row directly above also nail through the top edge of your target shingle, you must lift those overlying tabs and extract those nails as well. If you skip this step, the old shingle will remain anchored and will tear if you try to pull it out.
- Slide Out the Old Shingle: Once all eight nails (four from the target shingle, four from the course above) are removed, slide the damaged shingle out of place.
- Inspect the Underlayment and Decking: With the shingle removed, take a moment to inspect the exposed roofing felt (underlayment) and the wooden roof deck beneath. If the wood is soft, dark, or shows signs of rot, a simple shingle patch will not suffice. For more tips on identifying hidden deck damage during a repair, see How to Fix a Damaged Roof Shingle.
Installing and Sealing the New Shingle
With the deck inspected and cleared of any loose nails or debris, you are ready to install the replacement.
- Slide the New Shingle into Position: Slide the new shingle into the gap, tucking it under the overlying shingles. Align its bottom edge and side cutouts perfectly with the existing shingles on either side to maintain a straight horizontal line.
- Nail the Shingle in Place: Lift the overlying shingles slightly to expose the nailing line on your new shingle. Drive four new 1.25-inch galvanized roofing nails into the designated nail strip, spacing them according to the manufacturer’s guidelines (typically about an inch above the exposed tab area). Drive the nails flush—do not overdrive them, as this can cut into the shingle, and do not underdrive them, as protruding nail heads will eventually wear holes in the shingles above.
- Re-nail the Course Above: Replace the nails you removed from the shingles in the row directly above, driving them into new spots slightly adjacent to the old holes to ensure a tight grip.
- Seal the Tabs and Nail Heads: To ensure immediate wind resistance and water protection, manually seal the repair. Apply a quarter-sized dab of asphalt plastic roof cement under each tab of the new shingle and press down firmly. Additionally, apply a small spot of sealant over any exposed nail heads. This manual sealing is crucial because natural solar heat bonding can take weeks to occur during cooler seasons. For more on proper sealing techniques, check out our guide on shingle savvy: your guide to replacing asphalt roof shingles.
Key Challenges: Matching Shingles and Weather Timing
While the physical steps of replacing a shingle are straightforward, achieving a repair that looks good and performs reliably over time presents two major challenges: finding a matching shingle and timing the repair with local weather conditions.
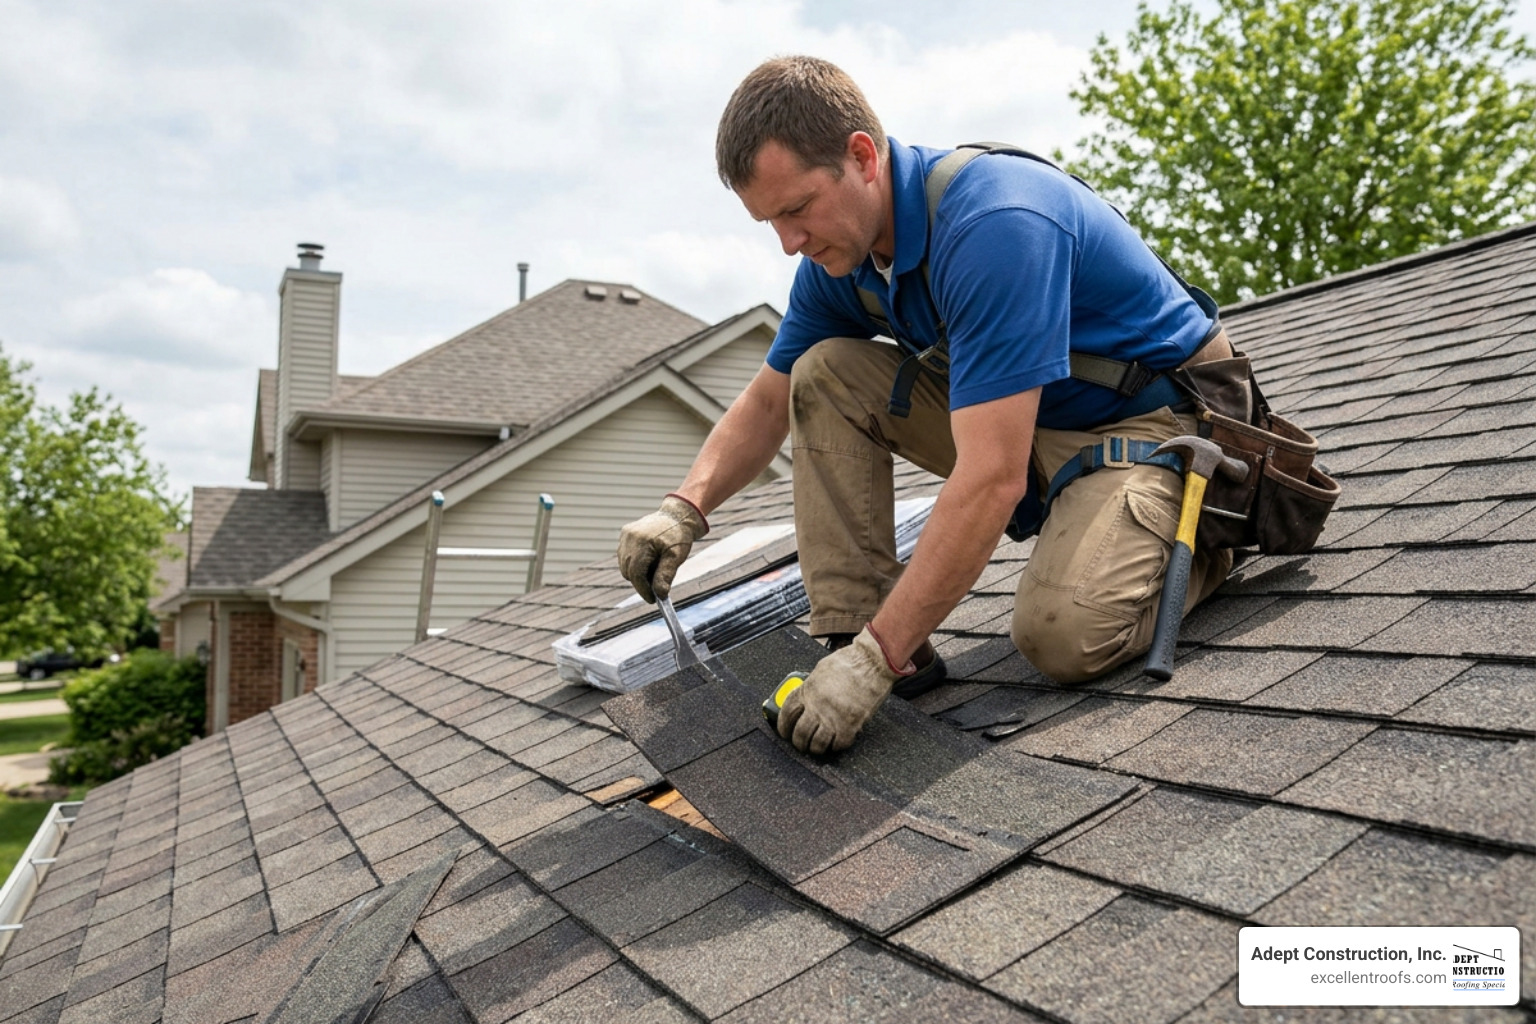
The Battle of Color Matching and UV Fading
Asphalt shingles are exposed to intense UV radiation, wind, and rain from the moment they are installed. Over time, this exposure causes the colored ceramic granules on the surface to fade and weather.
Because of this natural aging process, even if you purchase the exact same brand, style, and color name from a local supplier today, the new shingle will likely look significantly darker and more vibrant than your weathered roof. This can leave your home with a patchy, “checkerboard” appearance that hurts curb appeal.
- Pro Tip for a Seamless Match: If you do not have leftover shingles from the original installation, look for an inconspicuous area of your roof—such as a low-visibility valley or the back of a detached garage. You can carefully harvest a weathered shingle from that hidden spot to use as your visible patch, and then place the brand-new, slightly mismatched shingle in the hidden location.
For more strategies on managing broken shingles and maintaining your home’s aesthetic appeal, read our article on how to stop the drip by replacing your broken roof tiles and shingles.
Weather Considerations and the Risks of Delaying Repairs
Weather plays a massive role in both the success of your repair and the urgency with which it must be completed.
- The Temperature Sweet Spot: The ideal temperature window for replacing asphalt shingles is between 60°F and 80°F.
- If it is too cold (below 40°F): Asphalt shingles become extremely stiff and brittle. If you try to lift surrounding tabs to extract nails in cold weather, they are highly likely to snap or crack, turning a simple one-shingle repair into a multi-shingle disaster.
- If it is too hot (above 90°F): The asphalt becomes soft and highly susceptible to scuffing. Walking on a hot roof can easily rub off the protective granules, and tools can leave permanent black smears on the shingles.
- The Danger of Delay: If you delay replacing a missing shingle, you leave your home vulnerable to a domino effect of damage. The underlayment (felt paper or synthetic barrier) beneath your shingles is water-resistant, but it is not waterproof and degrades rapidly under direct sunlight. Once water penetrates the underlayment, it directly attacks the wooden roof deck, leading to rot, attic mold, ruined insulation, and interior ceiling stains.
For a complete breakdown of how weather patterns in northeastern Illinois affect roof degradation, see our guide on missing shingle repair and learn to spot early warning signs with our article on going from shingles to shambles: a guide to identifying damaged roofs.
Frequently Asked Questions About Shingle Repair
How quickly should missing shingles be replaced?
You should replace missing shingles as soon as possible, ideally within a few days of noticing the damage. While a single missing shingle is not an immediate structural emergency, it leaves your roof’s underlayment exposed to rain and UV rays.
In our local climate, sudden heavy downpours can quickly drive water under adjacent shingles, leading to active leaks. Addressing the issue immediately prevents minor wind damage from turning into a costly interior restoration project. You can explore typical repair costs in our comprehensive guide, the price is right: a guide to shingle repair costs.
Will Homeowners Insurance Cover Replacing Missing Roof Shingles?
Yes, homeowners insurance typically covers shingle repairs if the damage was caused by a sudden, covered peril, such as a severe windstorm, hail, or a fallen tree limb. However, insurers do not cover damage resulting from neglect, lack of maintenance, or normal wear and tear on an old roof.
That the cost of replacing just a few shingles ($150 to $400 for a professional repair) is often less than your policy’s deductible (which is commonly $1,000 or more). In these cases, filing a claim may not make financial sense. However, if a major storm has caused widespread damage across your entire roof, filing a claim for a full replacement is highly recommended. To help determine if your roof is simply showing its age, read the telltale signs: knowing when your old roof needs replacing.
When should you call a professional roofer instead of DIY?
While replacing one or two shingles on a low-slope, ranch-style home is an excellent DIY candidate, you should call a professional roofing contractor if you encounter any of the following:
- Steep Roof Pitches: If your roof has a steep slope (typically a 6:12 pitch or greater) or is two or more stories high, the fall risks are too high to attempt without professional-grade safety rigging.
- Spongy Decking: If you step on an area or remove a shingle and find that the wood beneath feels soft, wet, or springy, the roof deck has rotted and requires structural repair.
- Widespread Damage: If you are missing more than three or four shingles, or if shingles are missing across multiple sections of your roof, it usually indicates a systemic failure of the adhesive or nails.
- Warranty Concerns: If your roof is still under a manufacturer’s warranty, improper DIY repairs can void your coverage.
For homeowners who prefer peace of mind, hiring a professional ensures the job is done right the first time. You can learn more about our professional shingle roofing systems and repair services to see how we handle these challenges.
Conclusion
Replacing missing roof shingles is a highly effective way to extend the lifespan of your roof and protect your home from water damage, provided the damage is isolated and addressed quickly. By following the proper steps, using the right tools, and taking strict safety precautions, handy homeowners can successfully complete this repair themselves.
However, roof work is inherently hazardous, and minor mistakes in installation or sealing can lead to hidden leaks that rot your home’s structure from the inside out. If you are uncomfortable working at heights, suspect underlying wood rot, or are dealing with widespread storm damage, skipping the DIY route is a smart, strategic decision.
At Adept Construction, Inc., we have been providing honest assessments, superior customer service, and high-quality workmanship to our neighbors in Downers Grove and Naperville, IL for nearly 30 years. We treat every home like our own, ensuring your roof is fully weatherproof and secure.
If you have spotted missing shingles on your roof and want a professional, hassle-free evaluation, we are here to help. We provide completely free, no-obligation estimates to help you make the best decision for your home.
Contact Adept Construction, Inc. today for a professional inspection and a free estimate. Let us help you protect your home for the years ahead!
- Explore our specialized roof repair in Downers Grove, IL
- Visit our local service area in Downers Grove to connect with our team today.